Toolbars
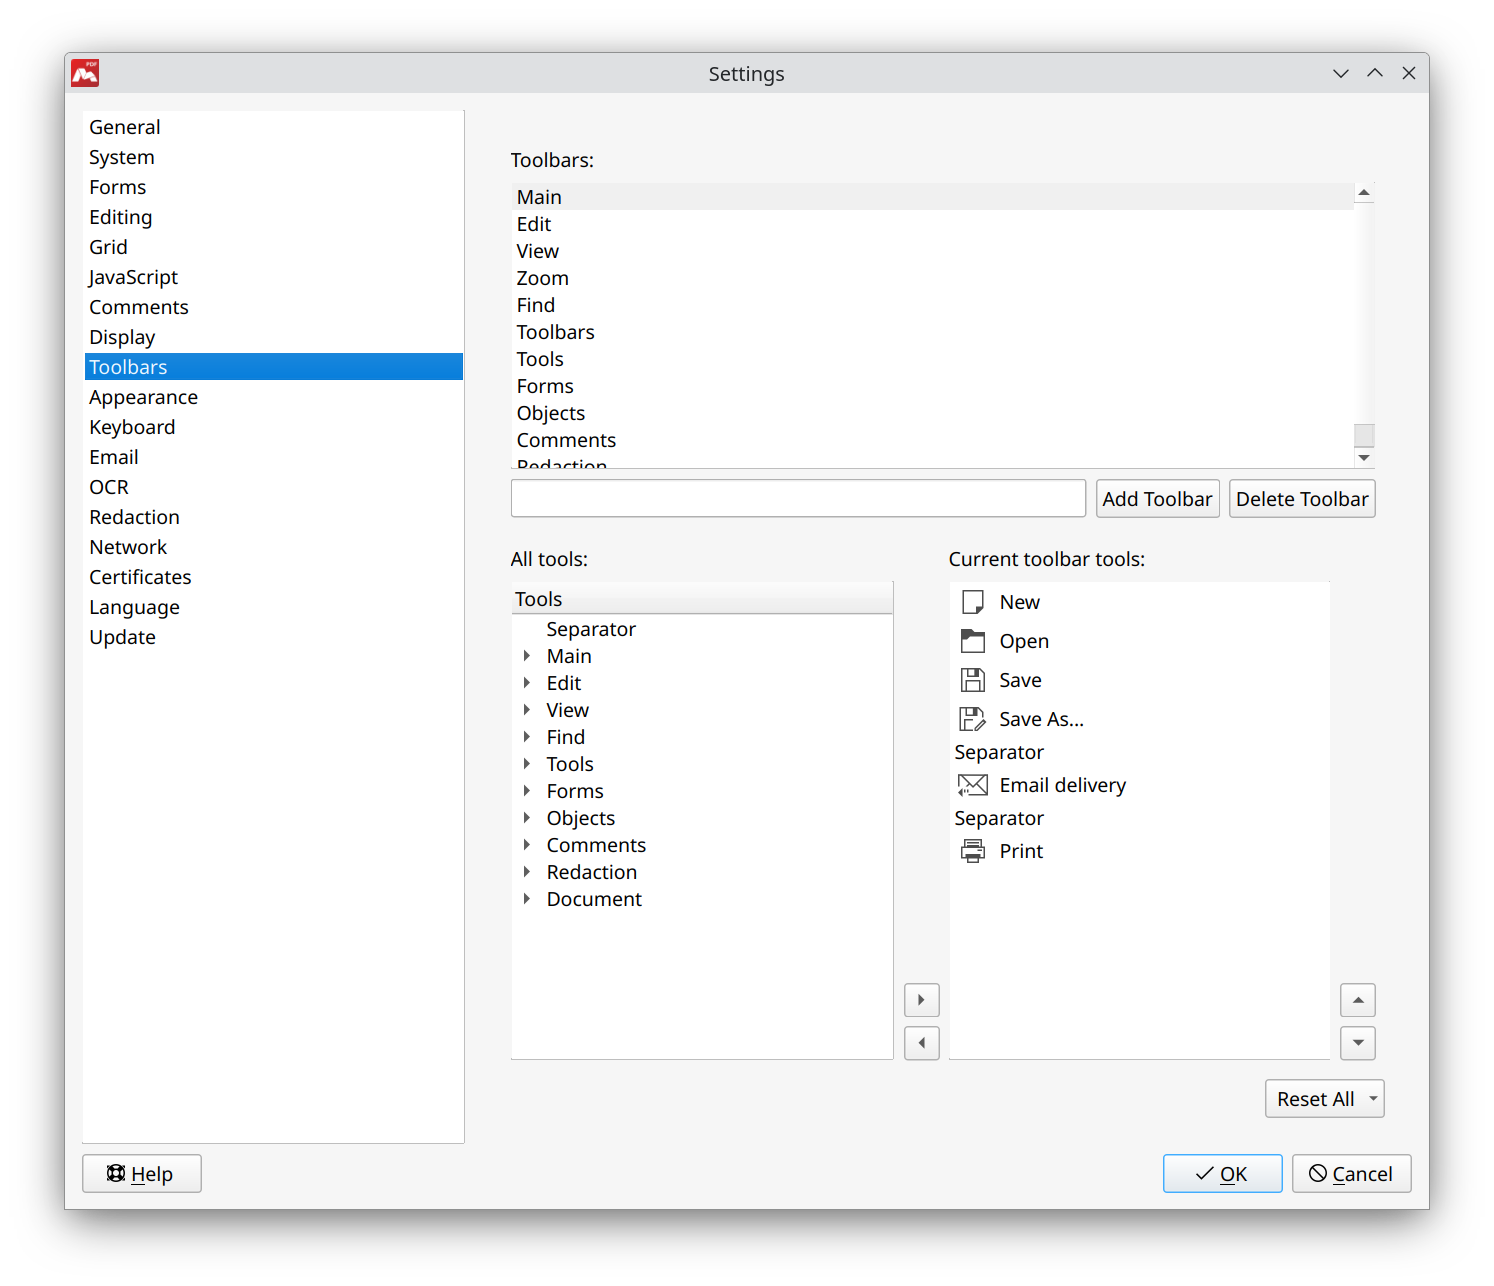
Users can configure the number and location of toolbars, as well as a specific set of tools on the Toolbars tab.

- Toolbars. This list contains existing toolbars. It’s enough just to select a toolbar and click the Delete Toolbar button To delete a toolbar. The tools in the selected panel will be displayed in the Current toolbar tools list.
- Add Toolbar. If the text field to the left of this button is filled, then when you click, an empty toolbar with the specified name will be created and added to the list.
- Toolbars customization.
You need to create a toolbar (if it hasn’t already been created) and select it in the Toolbars list to customize it.
The tree-like All tools list contains all available tools that are not added to the selected panel. Tools are divided into categories according to which you can find them in the main menu. Select it in the list and press the ► button to move a tool to the current panel. Select the tool in the Current toolbar tools list containing the tools of the selected panel and press the ◄ button to delete it.
The Separator is not a tool, although it is in the All tools list, beyond the category. This is a graphic separator allowing to divide the tools into categories within one panel. It can be added more than once.
The selected tool in the Current toolbar tools list can be deleted with the ◄ button. It can also be moved up or down with the corresponding ▲ and ▼ buttons relative to other tools.
The Reset All button allows you to reset the toolbars to one of the two predefined ones. The Minimum Tools set contains the minimum required tools in the visible panels, and a few more in the hidden ones. Right-click on any active tool in the main window to show hidden toolbars. There are visible marked toolbars in the drop-down list. From here, panels can be shown or hidden by checking or unchecking.
The Maximum tools set contains already all the available tools that are visible on the toolbars.
