Editing Objects in the PDF Document
Every PDF documents consists of PDF objects: images, text boxes, forms, vector objects. Editing a PDF document basically means editing properties of those objects. Despite being quite different in essence, PDF objects share many properties that can be edited the same way.
Master PDF Editor provides a range of tools for effortless editing of PDF objects.
Selecting PDF objects
To select an object in the PDF document, click the Edit document ![]() toolbar button, click the Tools > Edit document menu or press Alt+1 on the keyboard. Then click an object in the work area of the document.
toolbar button, click the Tools > Edit document menu or press Alt+1 on the keyboard. Then click an object in the work area of the document.
Selecting images, forms, and text objects
While the Edit document tool ![]() allows you selecting any objects in the document, there are also a number of tools to select specific types of objects:
allows you selecting any objects in the document, there are also a number of tools to select specific types of objects:
- Edit Text Objects tool
 allows you to select text objects. You can also select this tool in the Tools > Edit text menu or by pressing Alt+2.
 - Edit Forms
 is for selecting PDF forms (Alt+3)
 - Edit Images
 tool allows you to select images (Alt+4)
 - Edit Vector Images
 tool is for selecting vector images only (Alt+5)
Selecting multiple objects
To select several objects at once, use one of the following ways:
- Hold Ctrl and click objects you want to select
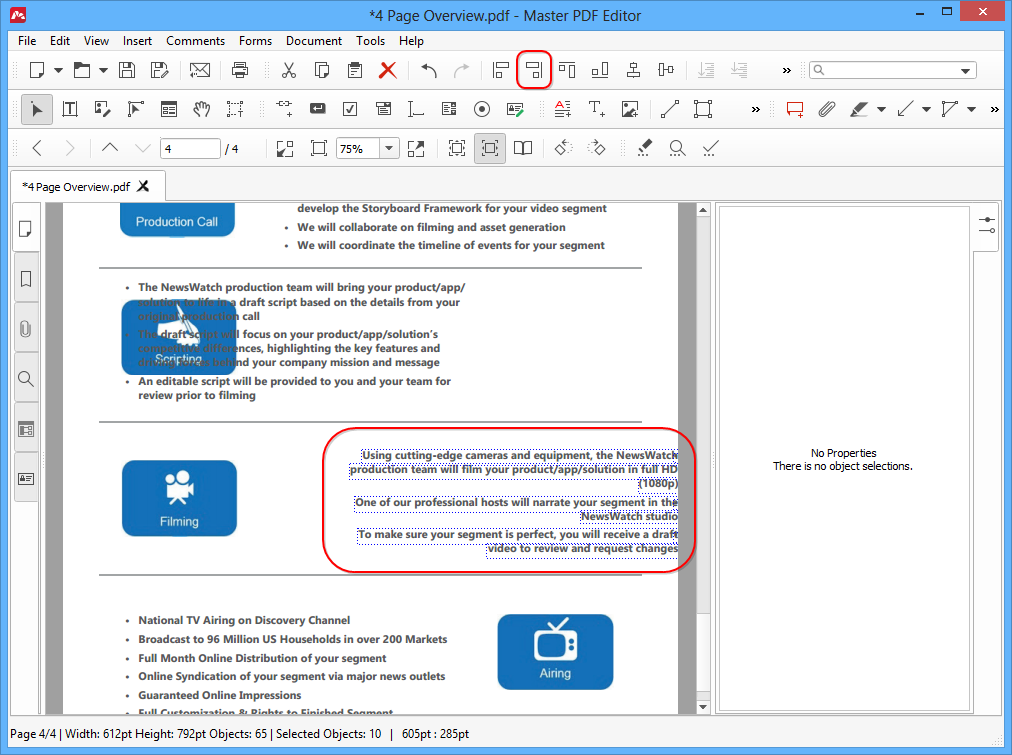
- Hold the mouse button and move the mouse to define a rectangle as shown below. All objects intersecting with this selection rectangle will be selected.
- Press Ctrl+A to select all objects on a page.

Moving objects
With mouse
To move an object, select it, then hold the left mouse button and move the object to a new place.
With keyboard
To move an object using the keyboard, select the object and press arrow keys on the keyboard. With each press of an arrow key, the object moves by 5 pixels in the corresponding direction. Hold Ctrl for more precise movement by 1 pixel each press.
Using Object Inspector
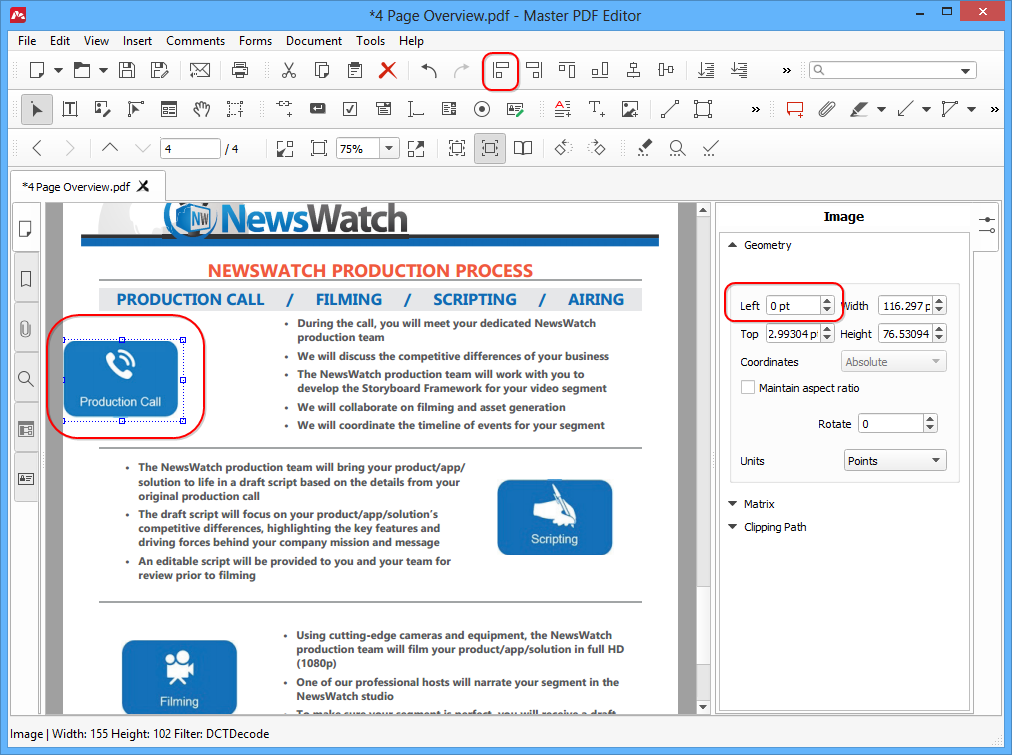
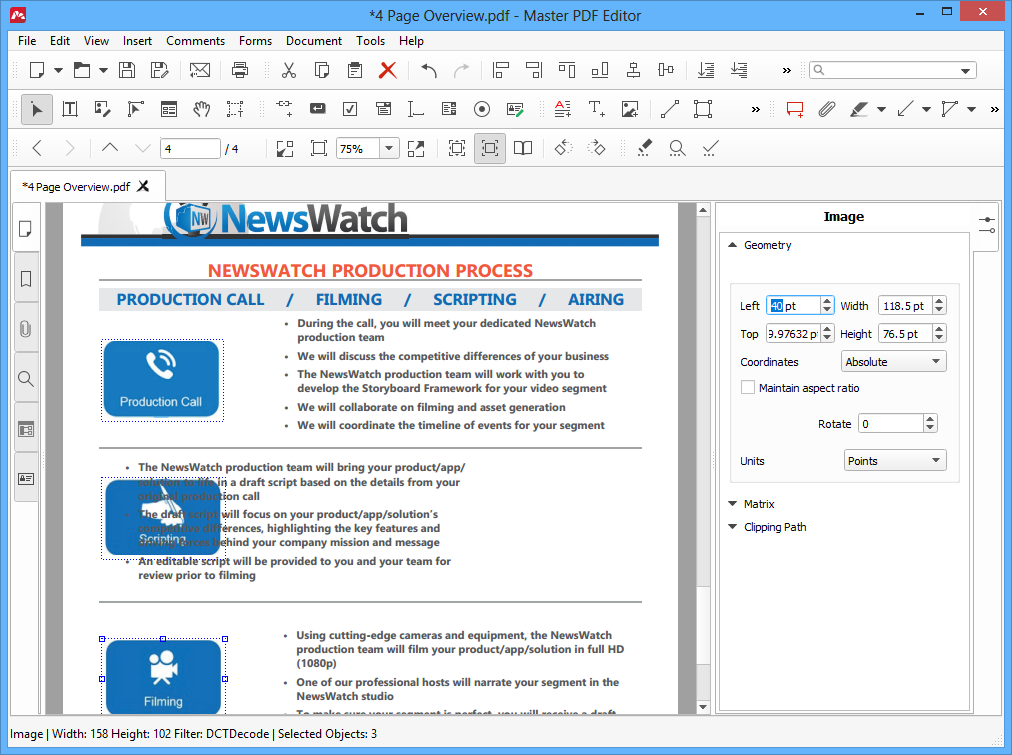
You can specify the exact coordinates to place the object at. To do this, select an object you want to edit, then click the Object Inspector button on the right side (or press Ctrl+F11) to display the Object Inspector. Open the Geometry section. Specify the coordinates of the object in the Left and Top boxes.
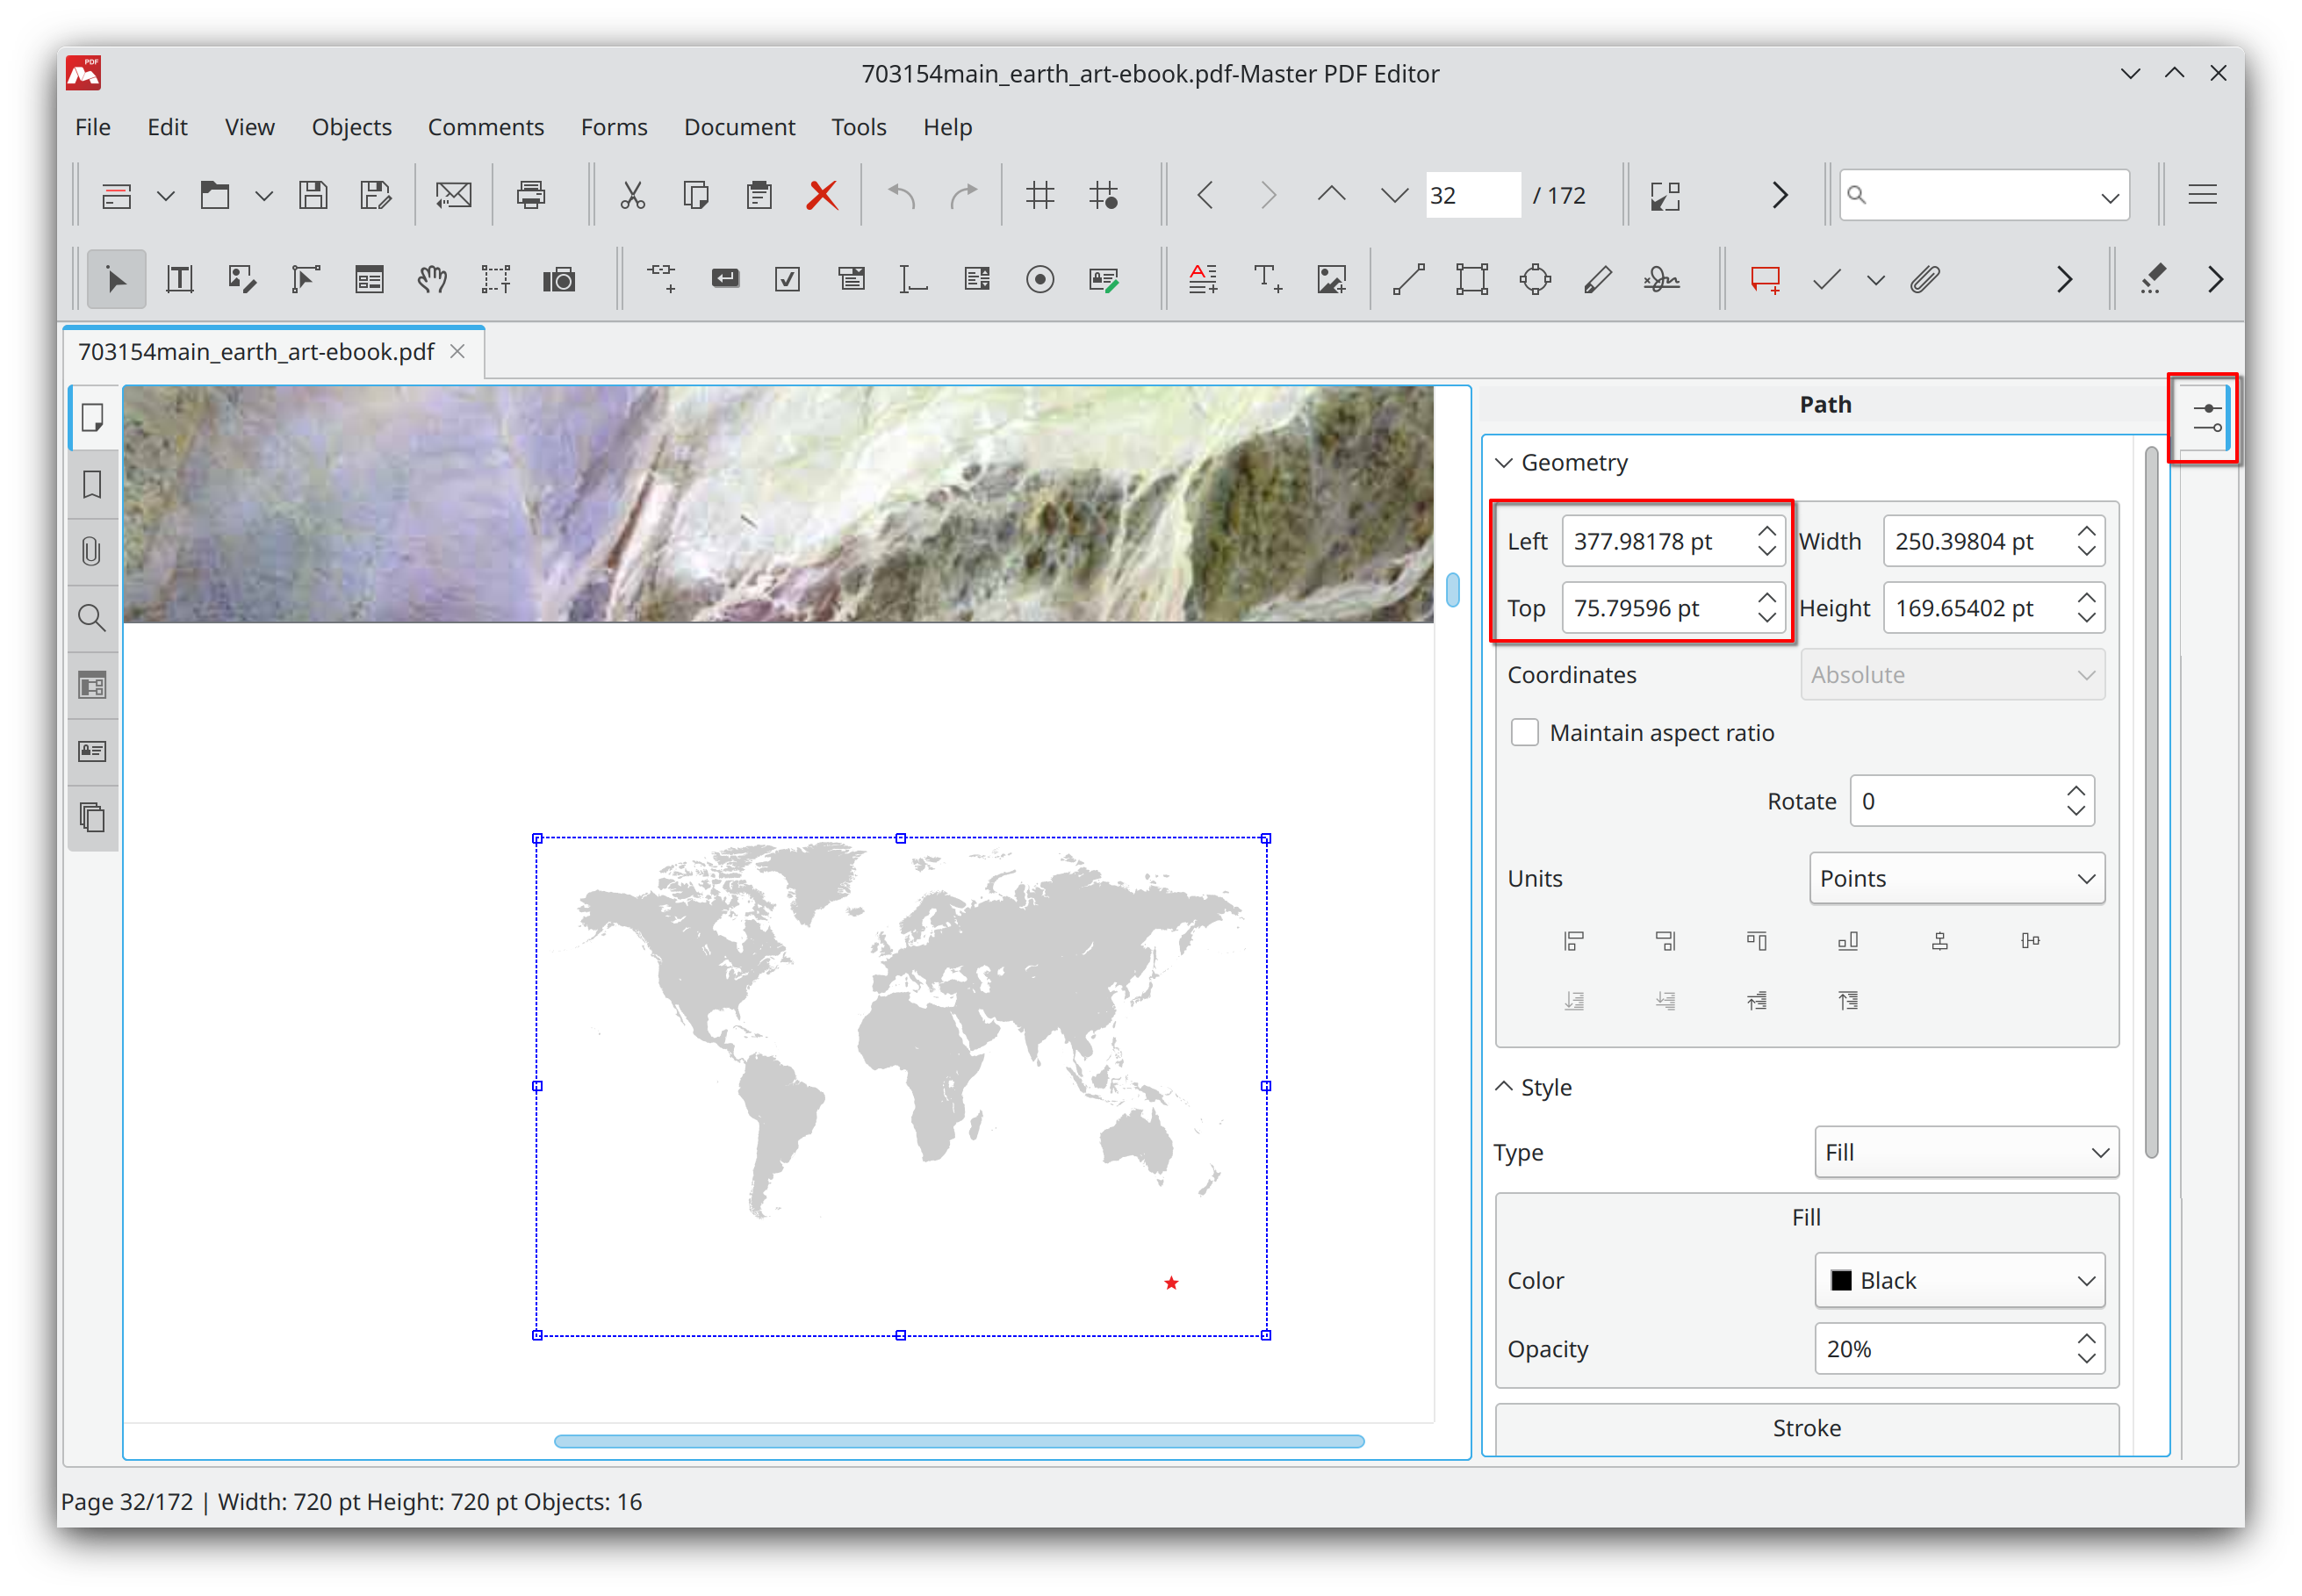
![]() Maximum value that can be set: 10000 pt, 138.889 inches, or 3571.429 mm. Minimum value that can be set: -10000 pt, -138.889 inches, or -3571.429 mm.
Maximum value that can be set: 10000 pt, 138.889 inches, or 3571.429 mm. Minimum value that can be set: -10000 pt, -138.889 inches, or -3571.429 mm.
The coordinates in the Left and Top boxes can also be specified with a numerical expression. The result of an expression is used as the coordinates.
Supported mathematical operators:
| Operator | Description |
|---|---|
| + | Adds numbers. |
| – | Subtracts numbers. |
| / | Divides numbers. |
| * | Multiplies numbers. |
Parentheses can be used as mathematical notation within a numerical expression:
| Character | Description |
|---|---|
| ( ) | This character is used to define the order of carrying out operations when performing calculations.
Example: (189.55+34.00)*2 pt As a result of this expression, 447.10 pt will be populated in the calculated field. |
Snapping to the grid
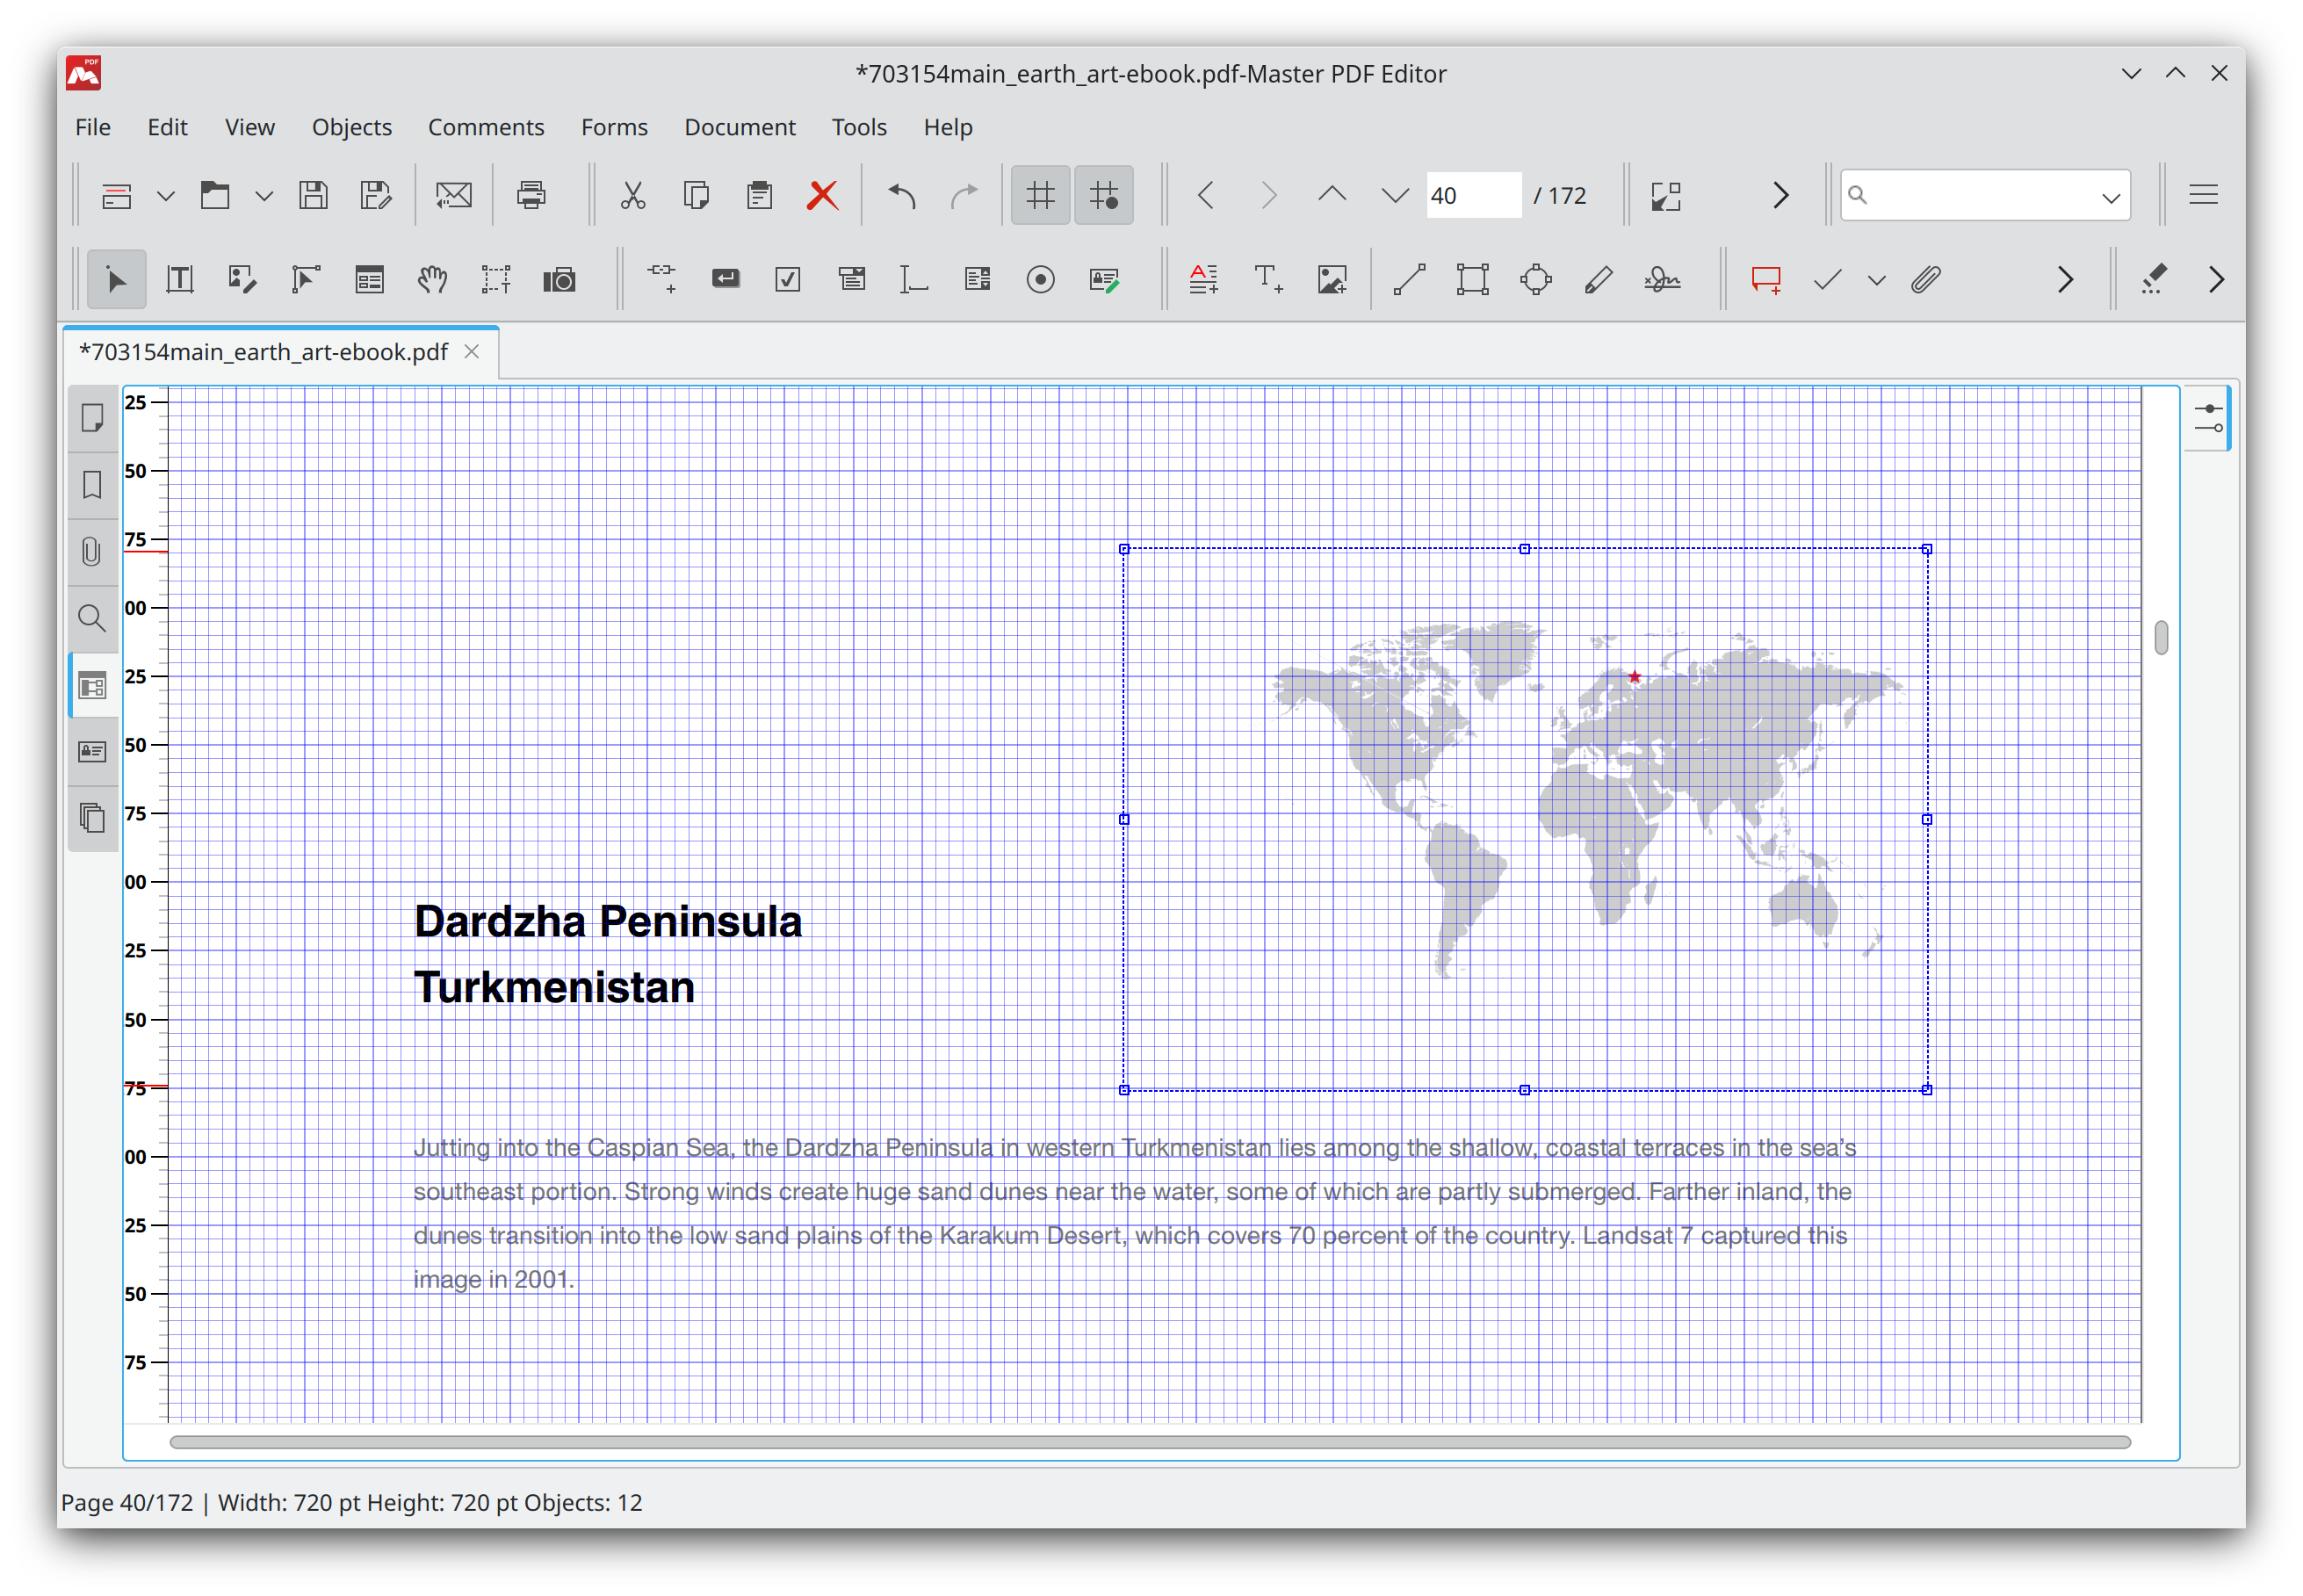
You can move objects across the page and keep them snapped to the grid. This simplifies arranging objects on the page and keeping them aligned with each other.
To enable snapping to the grid, choose the View > Snap to Grid menu item or press Ctrl+Shift+U. To display the grid, select View > Grid or press Ctrl+U.
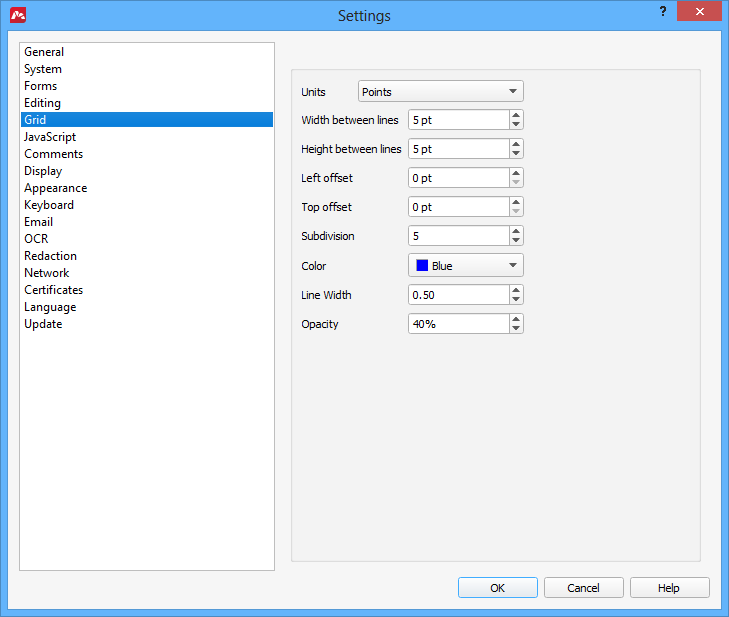
 You can configure grid parameters in the Tools > Settings menu, the Grid section.
Cutting, copying, and pasting objects
To copy an object to the clipboard, select it and use the Edit > Copy menu command or click the Copy toolbar button or press Ctrl+C.
To cut and object – that is, copy it to the clipboard and then delete from its original location – select the object and use the Edit > Cut menu command or click the Cut toolbar button or press Ctrl+X.
To paste an object from the clipboard to its new place, use the Edit > Paste menu command or click the Paste toolbar button or press Ctrl+V.
The same commands are also available in the context menu:

Pasting to multiple pages
You can insert the object in the clipboard to multiple pages in one action. To do this, click the Edit > Paste to Multiple Pages menu item or press Ctrl+Shift+V. The following window appears:
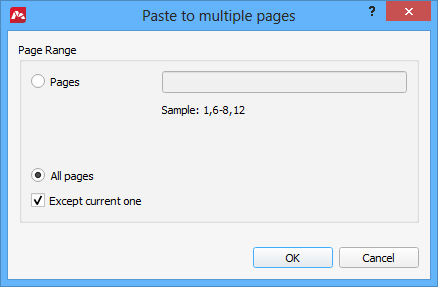
Choose where you want this object to paste and click OK. This function is helpful when you need to paste the same header all over the document or add some information block to every page.
Resizing objects
With mouse
Select the object you want to resize. Drag a handle to resize the corresponding side or corner of the object box.
NOTE: Hold Shift while dragging to maintain the aspect ratio of the object.
Using Object Inspector
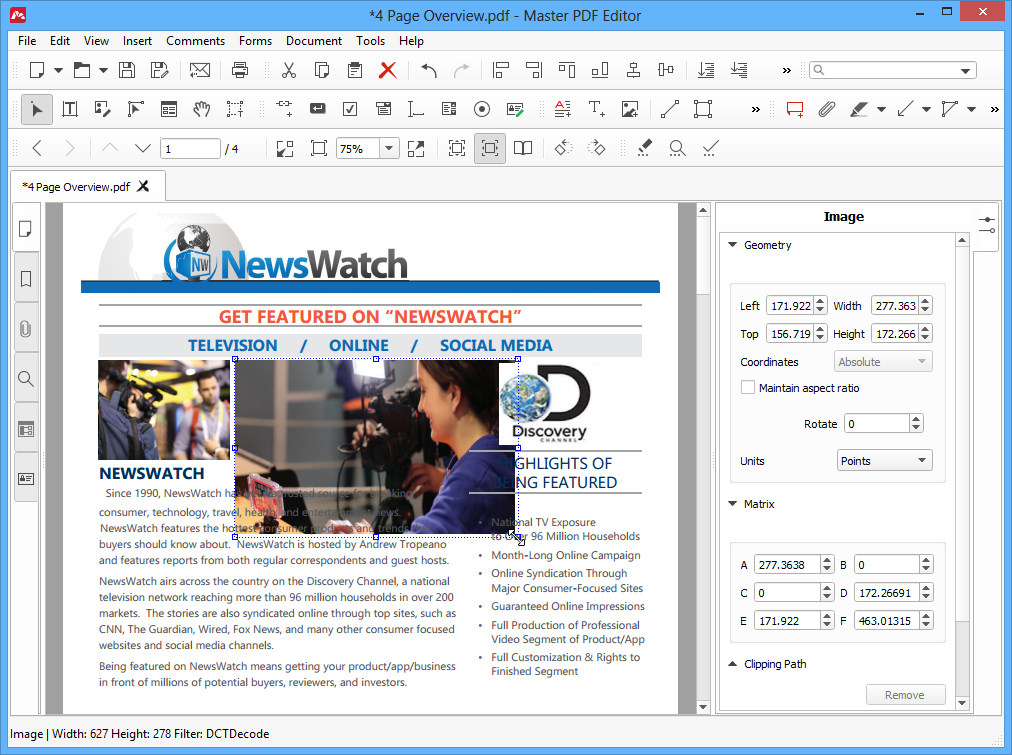
Select the object you want to resize. Then bring up the Object Inspector by clicking its button in the right side panel or by pressing Ctrl+F11. Open the Geometry section. Then, enter the exact Width and Height of the object to the corresponding boxes:
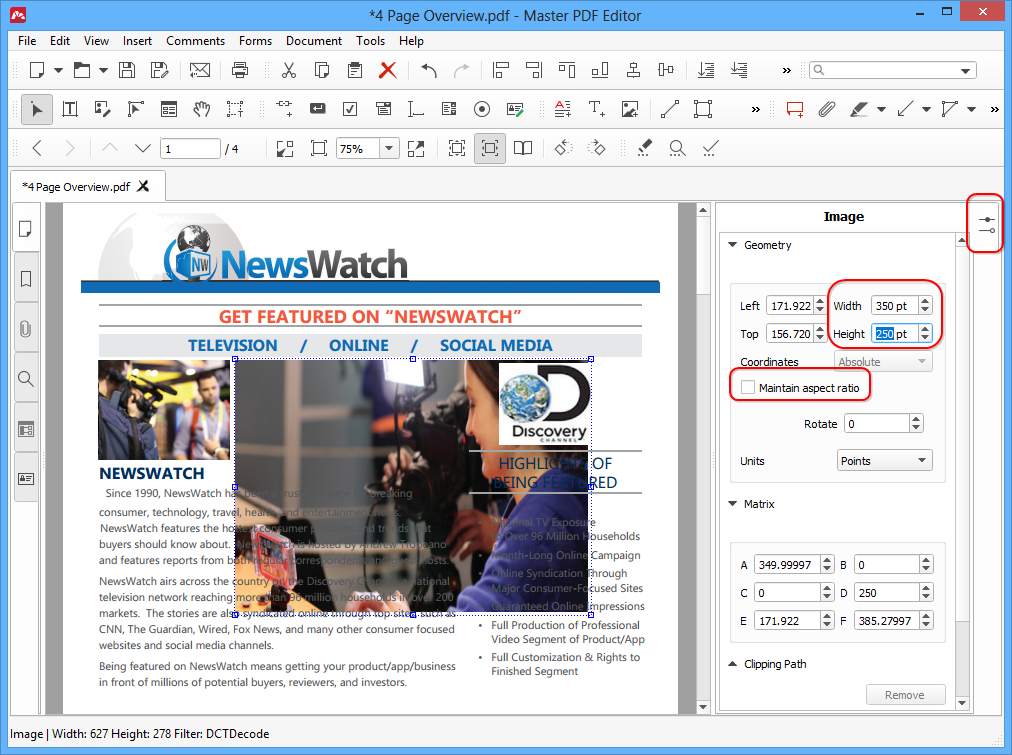
Turn on the Maintain aspect ratio option to keep the aspect ratio of the resized object.
NOTE: the clipping path is not resized along with the object. You will need to remove the clipping path by clicking the Remove button in the Clipping Path section of the Object Inspector. Read more about clipping paths here.
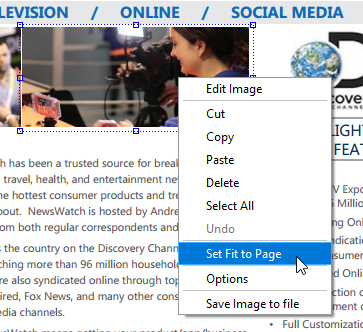
You can also resize an object to make it fit the page entirely. Select an object, then right-click it and choose Set Fit to Page item in the context menu.
NOTE: Fit to page does not work for formatted text objects, forms and comments.
Rotating objects
Objects can be rotated either by specifying the rotation angle value in the Object Inspector or with the Rotation handle.
Rotating objects using the Object Inspector
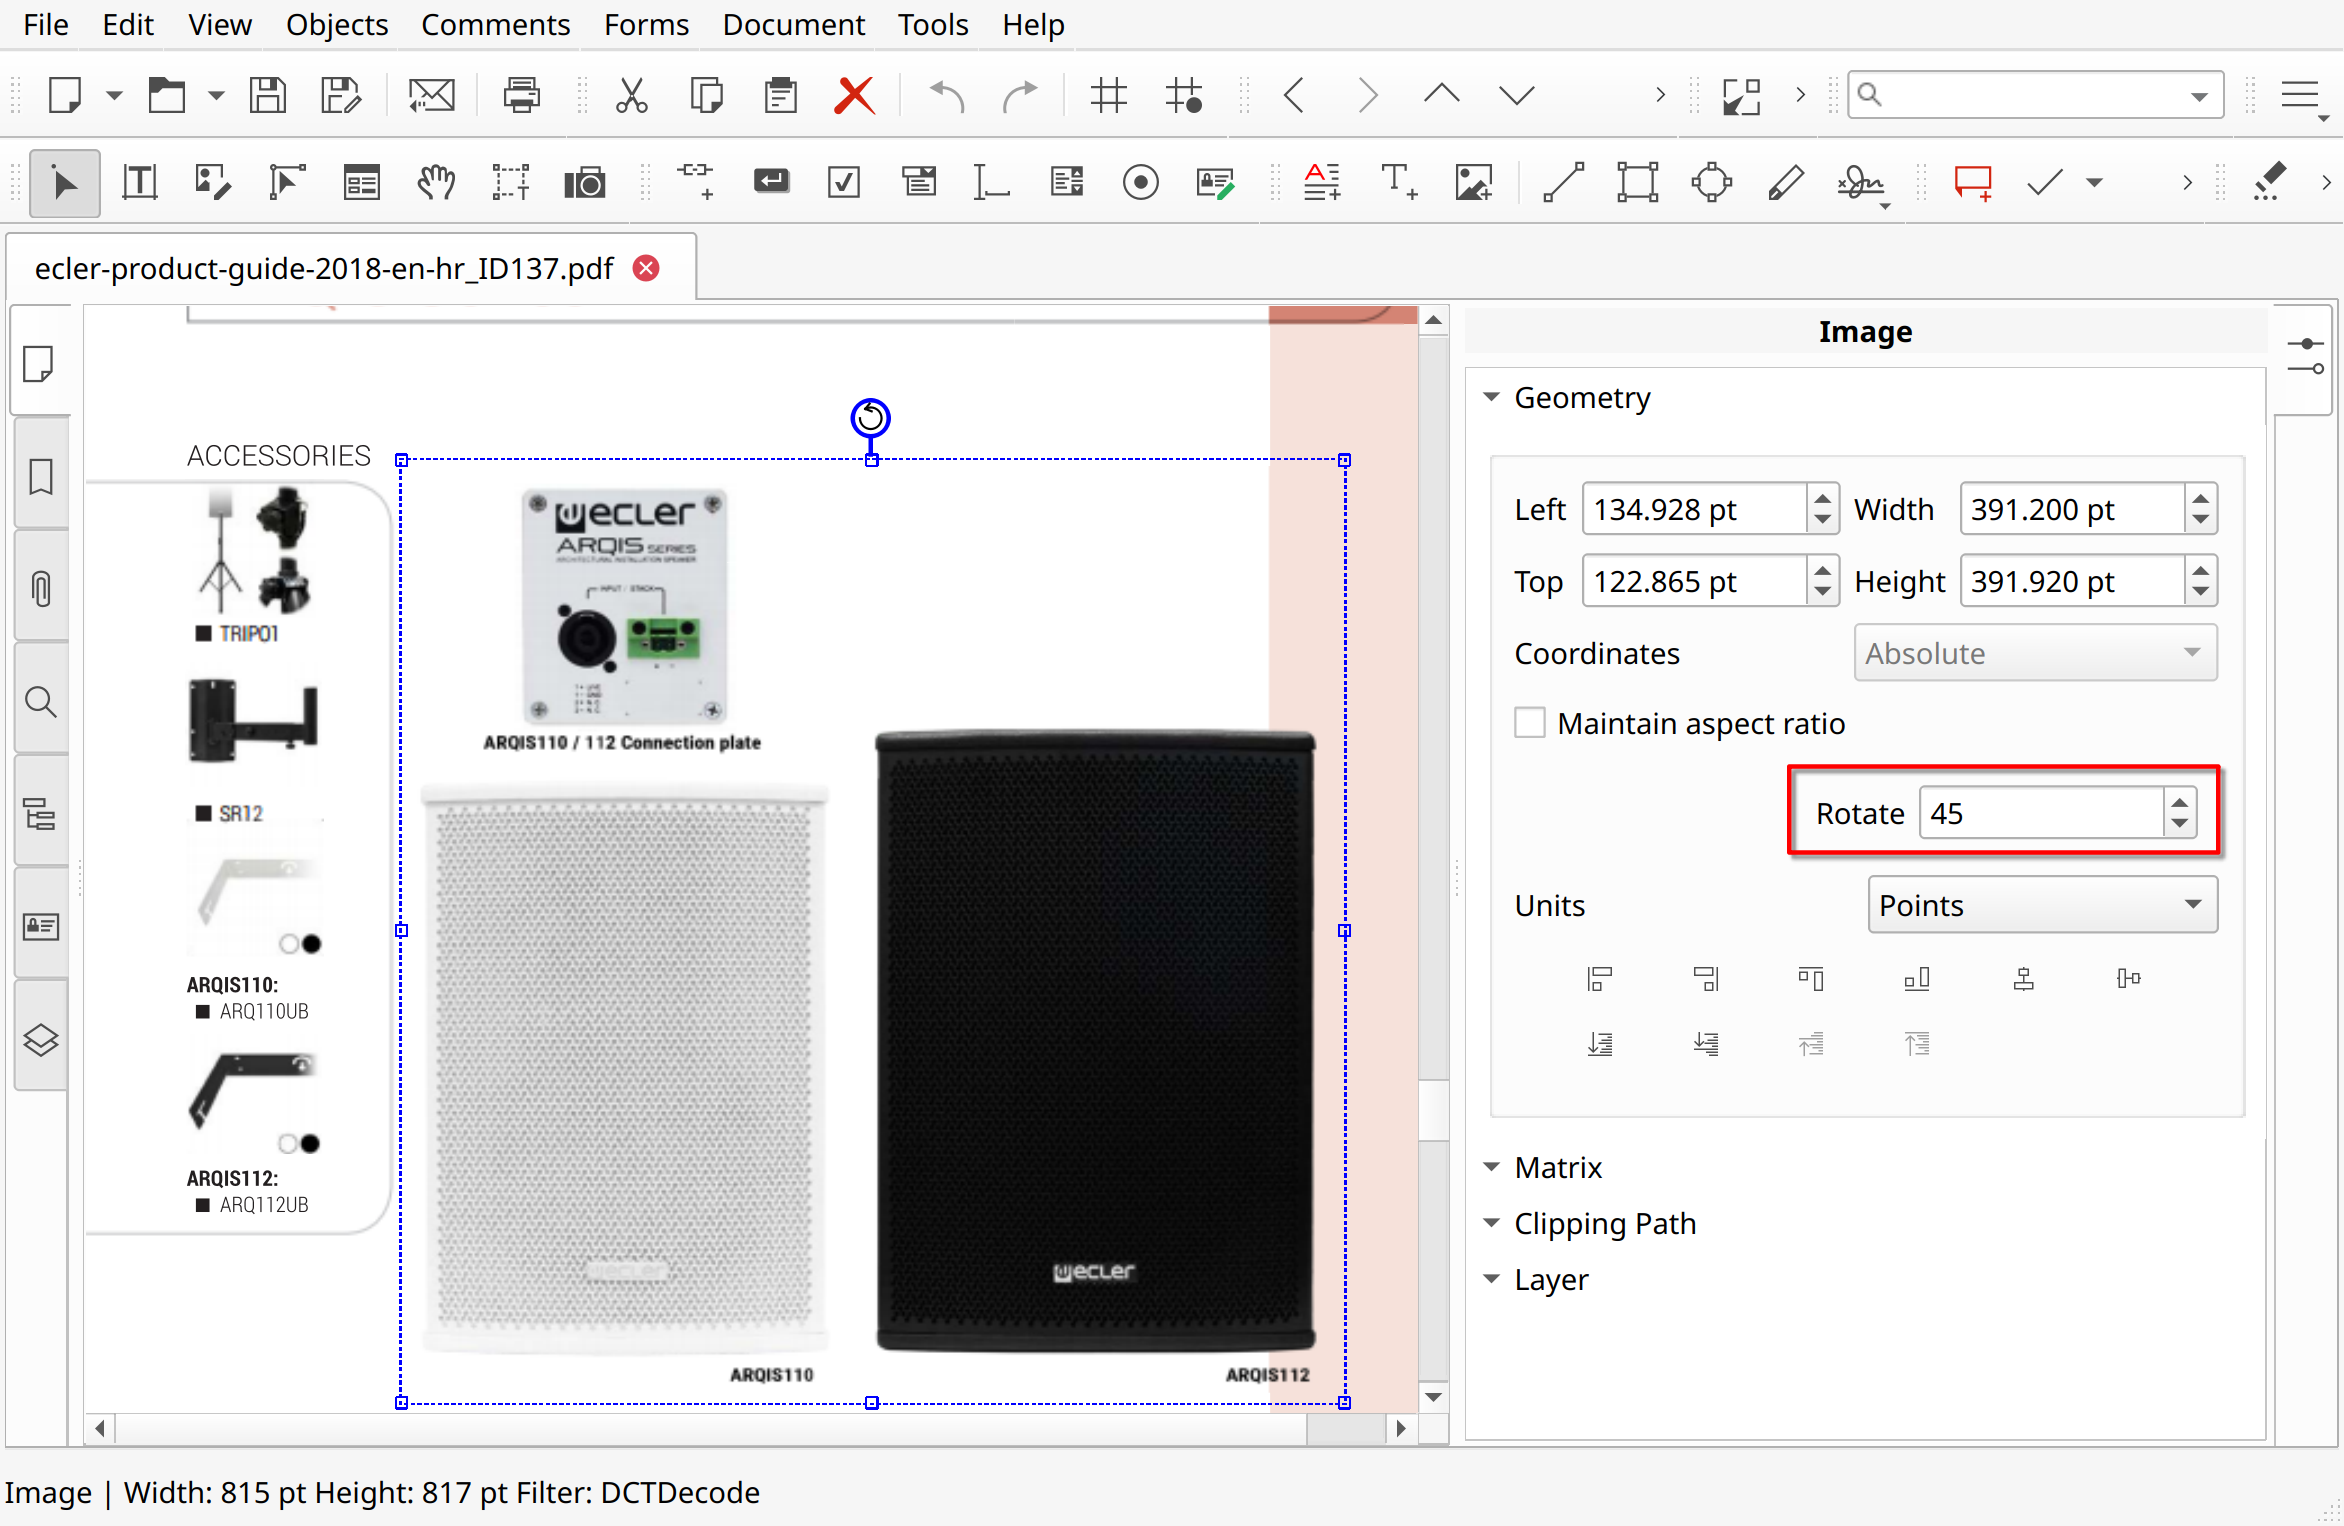
To rotate objects, first select them and open the Object Inspector (Ctrl+F11). Navigate to the Geometry section, then input the desired rotation angle into the Rotate field and press Enter.
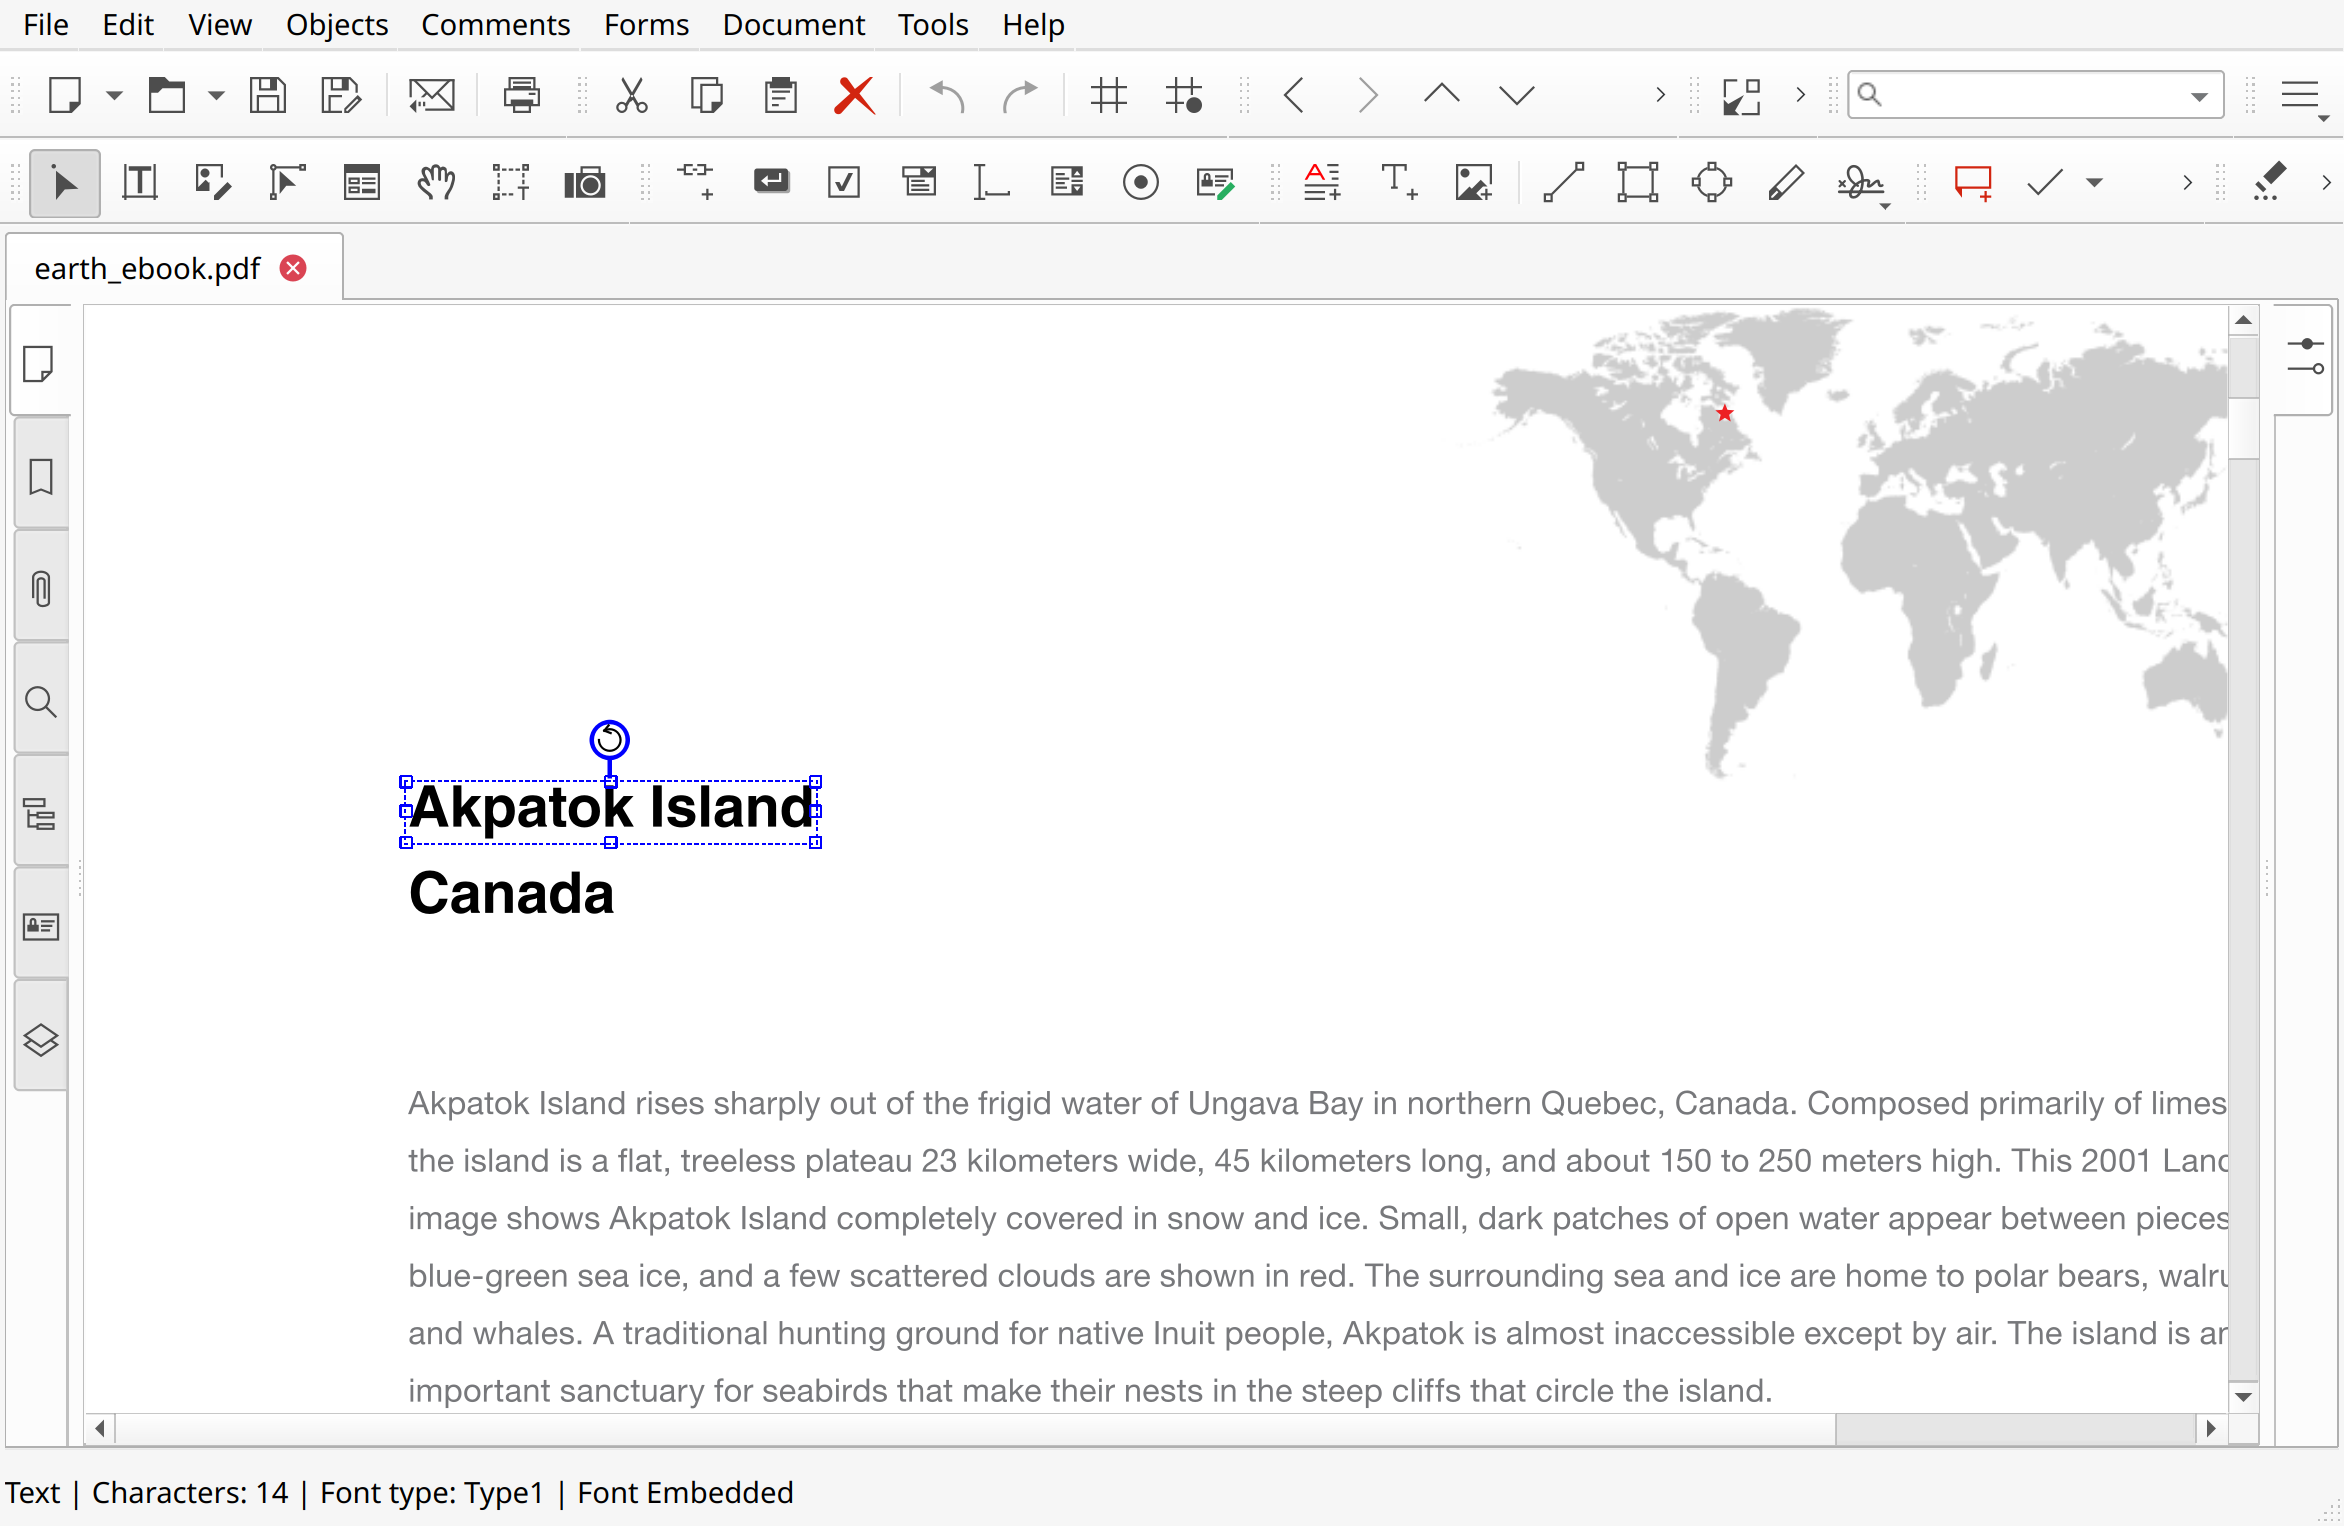
Rotating objects with the Rotation handle
Select an object using the Edit Document tool or another appropriate tool. Once the object is selected, a Rotation handle ![]() will appear above it.
will appear above it.
![]() When multiple objects are selected, the Rotation handle
When multiple objects are selected, the Rotation handle ![]() will appear at the top of the object you clicked on last.
will appear at the top of the object you clicked on last.
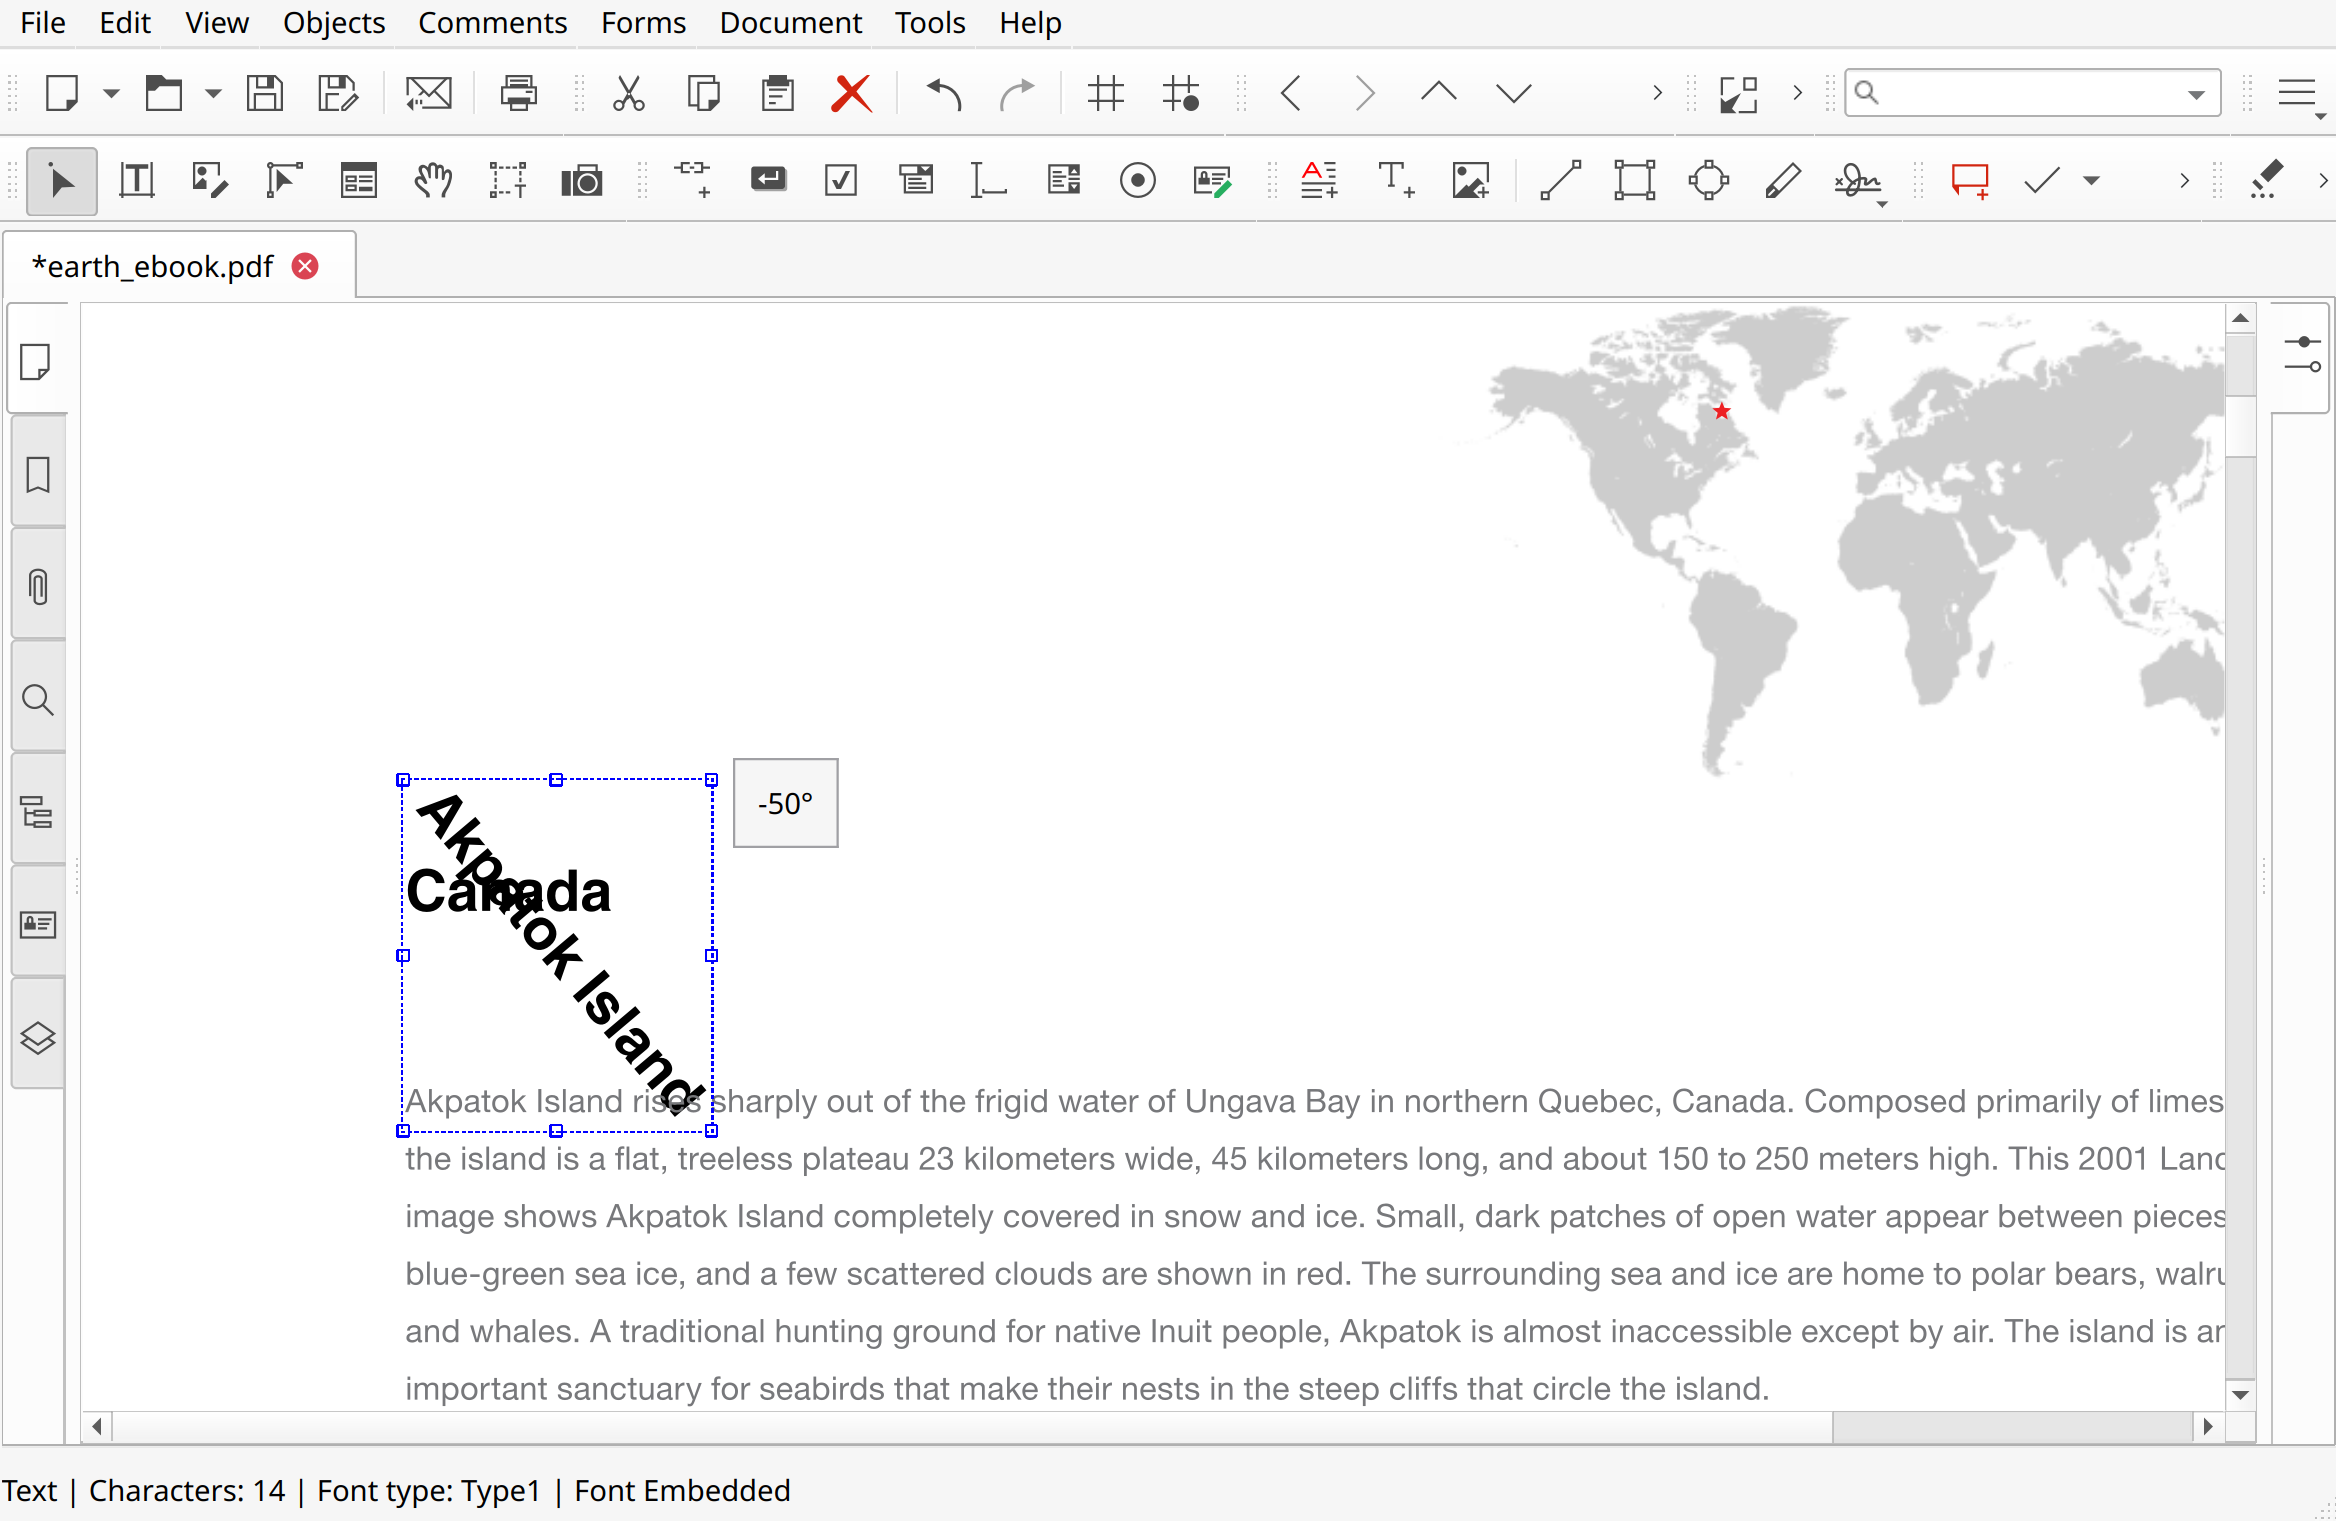
Hold the Rotation handle to rotate the object. Drag the Rotation handle left or right to adjust the rotation of the objects. As you rotate, the degree of rotation will be displayed.
![]() Hold the Shift key while rotating to lock the rotation to angles that are multiples of 45 degrees, ensuring a precise result.
Hold the Shift key while rotating to lock the rotation to angles that are multiples of 45 degrees, ensuring a precise result.
![]() The clipping path is not rotated along with the object. You will need to remove the clipping path by clicking the Remove button in the Clipping Path section of the Object Inspector. Read more about clipping paths here.
The clipping path is not rotated along with the object. You will need to remove the clipping path by clicking the Remove button in the Clipping Path section of the Object Inspector. Read more about clipping paths here.
Aligning objects
To align one or more objects, you need to select them first. Then, apply one of Align commands using either the Edit > Align Objects menu or the Align toolbar buttons: align by left edge ![]() , by right edge
, by right edge ![]() , by top edge
, by top edge ![]() , by bottom edge
, by bottom edge ![]() or center align vertically
or center align vertically ![]() or horizontally
or horizontally ![]() .
.
If one object is selected, it is aligned by the edge of the page:
If multiple objects are selected, all selected objects are aligned by the edge of the active object (the one with handles):
If multiple objects are selected and there’s no active object among them, all selected objects are aligned by the edge of the page:
Using Object Inspector to align objects
Select multiple objects as described in the Selection section above. Make sure there is an active object in the selection. Normally, when you select objects while holding Ctrl the last clicked object remains active.
Then, in the Object Inspector panel you can adjust the position and alignment of the selected objects.
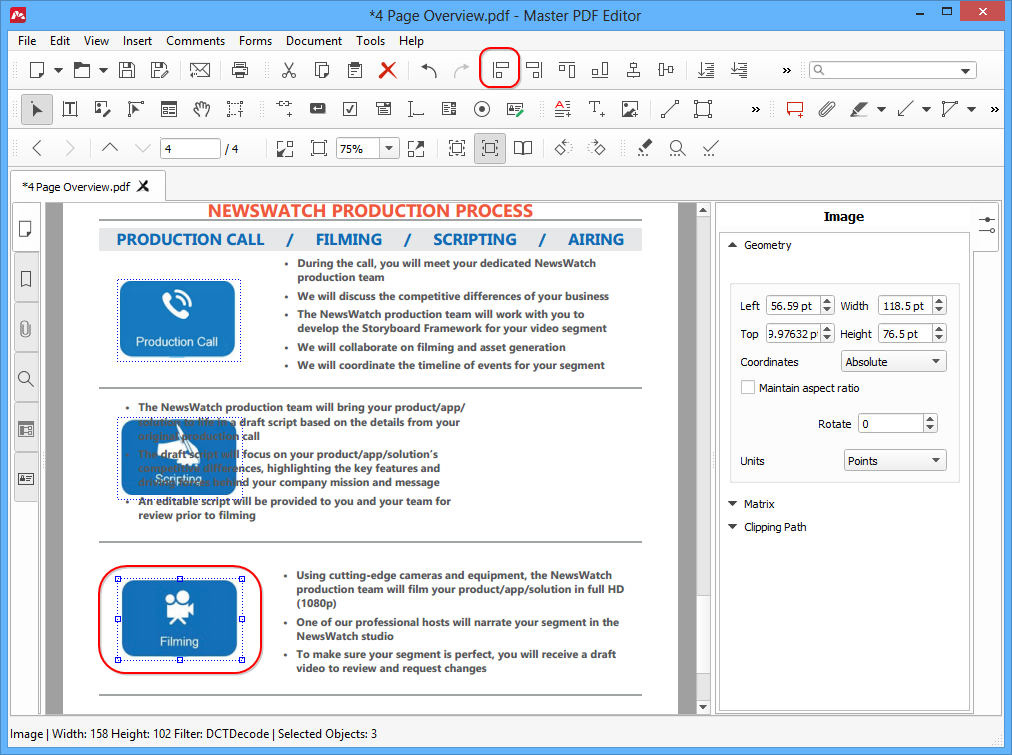
Let’s say you want to align all the selected objects by the left edge of the page and put them 40 points away from the edge. Here is what you should do:
- Select objects
- Bring up the Object Inspector by clicking its button in the right panel or pressing Ctrl+F11.
- Set the Left parameter to 40, the Coordinates option to Absolute and the Units dropdown to Points.
Now, what if you need to align these objects by the top edge too?
- Switch the Coordinates to Relative
- Enter the Top
All the selected objects will be aligned by the top edge of the page, and the distance between objects will remain the same.
Changing Z-order of objects
Z-order defines the order in which intersecting objects on the page appear. Objects with higher Z-order overlap objects with lower Z-order.
The following commands allow you to modify Z-order of the selected object(s):
- Send to Back
 – sends the selected object back on the page. It will appear as lying below any other objects overlapping with it.
 - Bring to Front
 – makes the selected object the topmost on the page. It will appear as lying on top of any other objects overlapping with it.
 - Send Backward
 – send the selected object backward by one position. The selected object exchanges Z-order positions with the object lying right below it.
 - Bring Forward
 – bring the selected object forward by one position. The selected object exchanges Z-order positions with the object lying right above it.
To change the Z-order, use the Edit menu or the corresponding buttons on the toolbar.
Deleting objects
To delete one or more objects, select them and do one of the following:
- Press Del on the keyboard
- Right-click and select the Delete command in the context menu
- Use the Edit > Delete menu command
- Click the Delete Object
 button on the toolbar
Undo and Redo operations
To undo the last operation, do one of the following:
- Click the Undo
 toolbar button
 - Choose the Edit > Undo menu command
- Press Ctrl+Z
To redo the last undone operation, do one of the following:
- Click the Redo
 toolbar button
 - Choose the Edit > Redo menu command
- Press Ctrl+Y
IMPORTANT: You can undo only operations with objects (i.e. texts, forms, images, annotations). Operations over pages such as: moving a page, rotating a page or removing a bookmark cannot be undone.
More like this: