Scanning paper documents to PDF
This function allows creating a PDF file directly from a paper document, using your scanner and the Master PDF Editor.
![]() Please note that these settings are relevant only for Linux operating systems.
Please note that these settings are relevant only for Linux operating systems.
To create a new document from scanner, choose File > From Scanner in the main menu, or press the Create a new document from scanner button ![]() on the toolbar.
on the toolbar.
Scanner selection
![]() Scanner selection is available only on Linux systems.
Scanner selection is available only on Linux systems.
Upon the first scanning session, the Select Scanners dialog will open. It displays a list of available devices.
Check one or several scanners you need and click OK. The selected scanners will be added to the Scanner drop-down list in the Scan dialog.

The Select Scanners dialog also includes the following options:
- Always search for devices – automatically search for available scanners each time scanning is started.
- Show network scanners – display scanners connected to the network in the list.
The Reload button performs the search again and refreshes the list of scanners.
After selecting a scanner, the Scan dialog opens to configure scanning parameters.
How to change the selected scanner
Further actions depend on whether the Always search for devices option is enabled:
If Always search for devices is enabled:
The Select Scanners dialog opens automatically each time scanning is started. Uncheck the device which is no longer required, check the needed scanner, and click OK.
If Always search for devices is disabled:
- Open the Scan dialog by selecting File > New > From Scanner in the main menu or select Create a new document > From scanner on the toolbar.
- Open the Select Scanners dialog using one of the following methods:
- 2.1. Click the refresh button
 to the right of the Scanner drop-down list.
 - 2.2. Click the Scanner drop-down list and select Select Scanners at the bottom of the list.
- 2.1. Click the refresh button
- In the opened dialog, uncheck the device which is no longer required, select the new scanner, and click OK.
Scan settings on Linux
The Scan dialog allows you to save frequently used parameter combinations as presets and configure device, source, and visual scanning parameters.
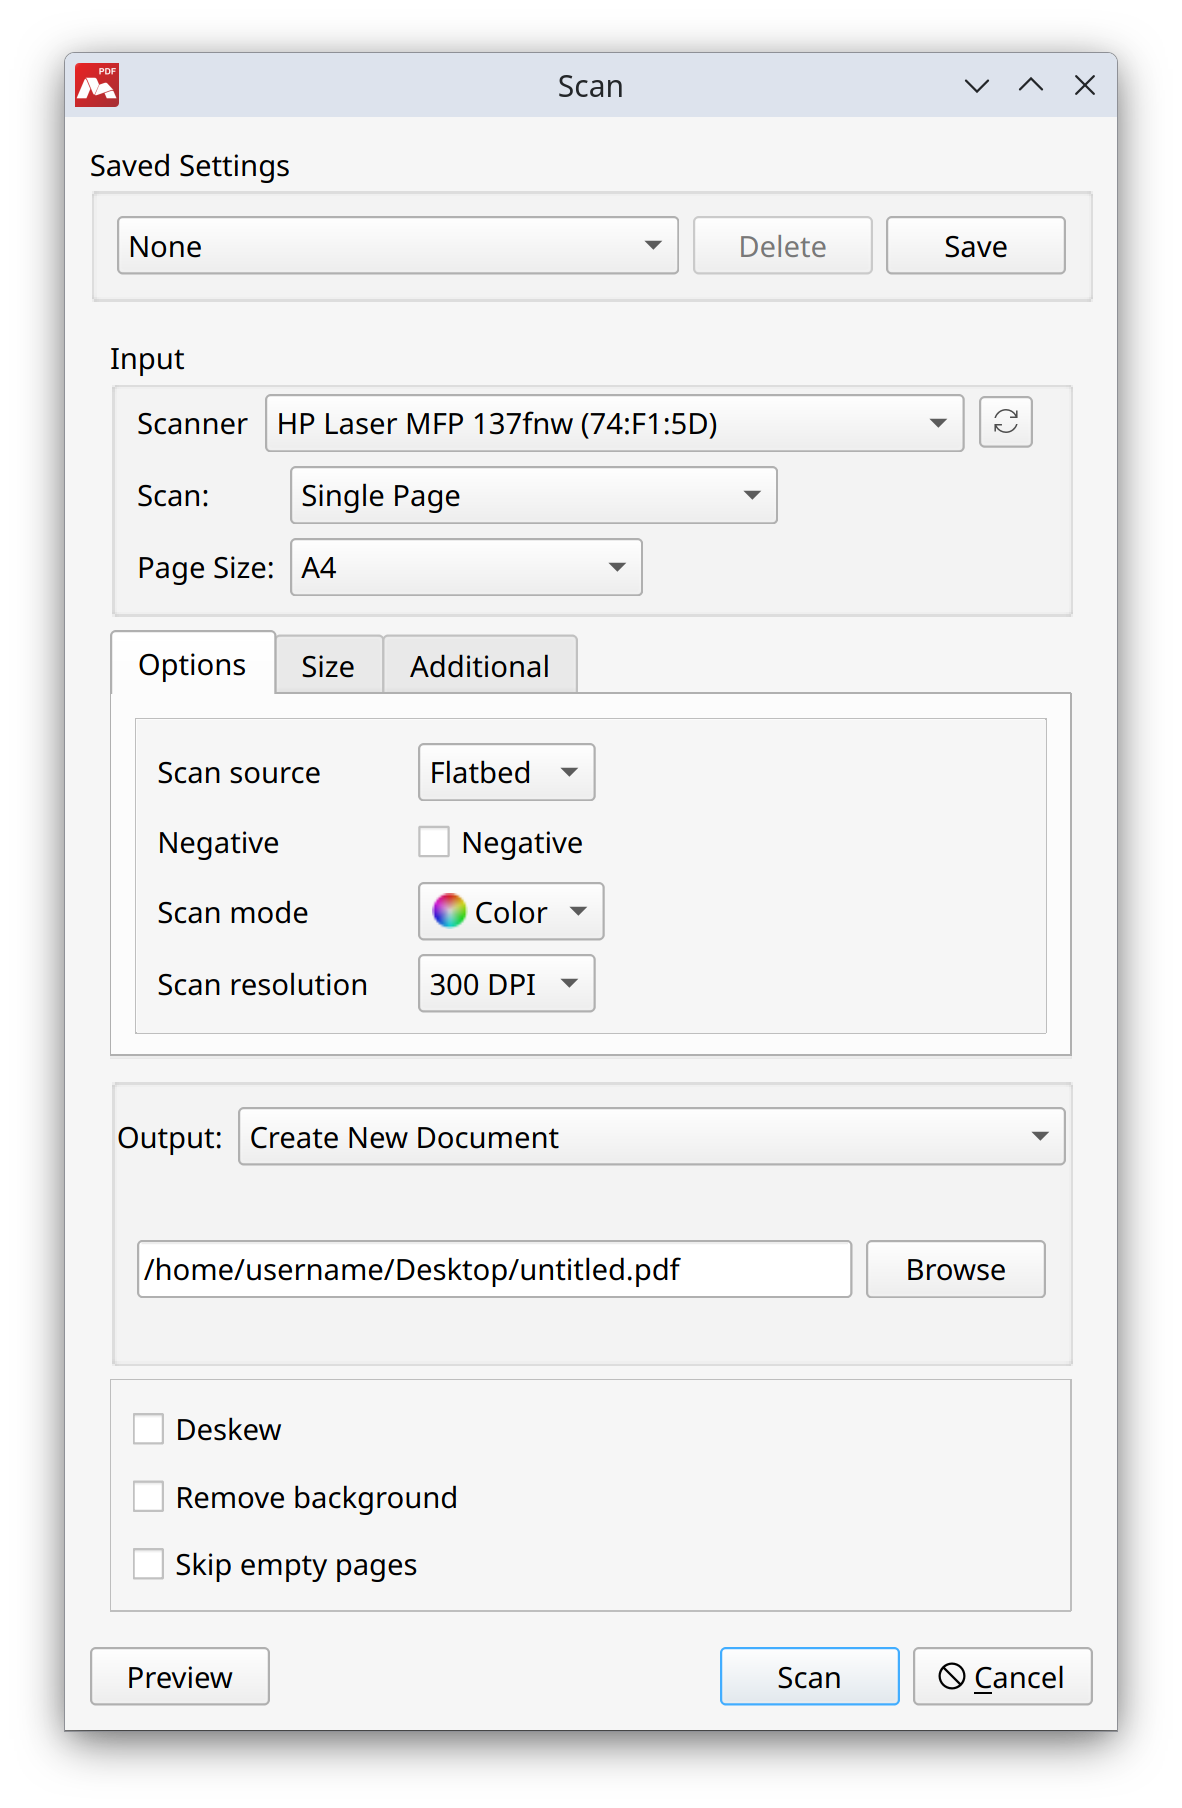
All the inputs that can be changed are described below.
Saved Settings
Allow saving all the settings that were applied previously and saved as a template. Once you choose this template from the list, all the preset settings will be applied.
Input
- Scanner. Choose one of the connected scanners installed in the system from the list in Scan dialog box. To find new devices, you need to update the list by clicking the refresh button
 on the right of the Scanner drop-down list.
![]() Note: if there are many connected scanners, the updating process can take some time.If the scanner is disconnected or offline, a red Offline text will appear next to its name in the list after selection.
Note: if there are many connected scanners, the updating process can take some time.If the scanner is disconnected or offline, a red Offline text will appear next to its name in the list after selection.
- Scan. Choose if you need to scan a single page or all pages from the feeder.
- Page Size. Allows selecting the size option of the scanned document from the list below that suits your needs.
Options
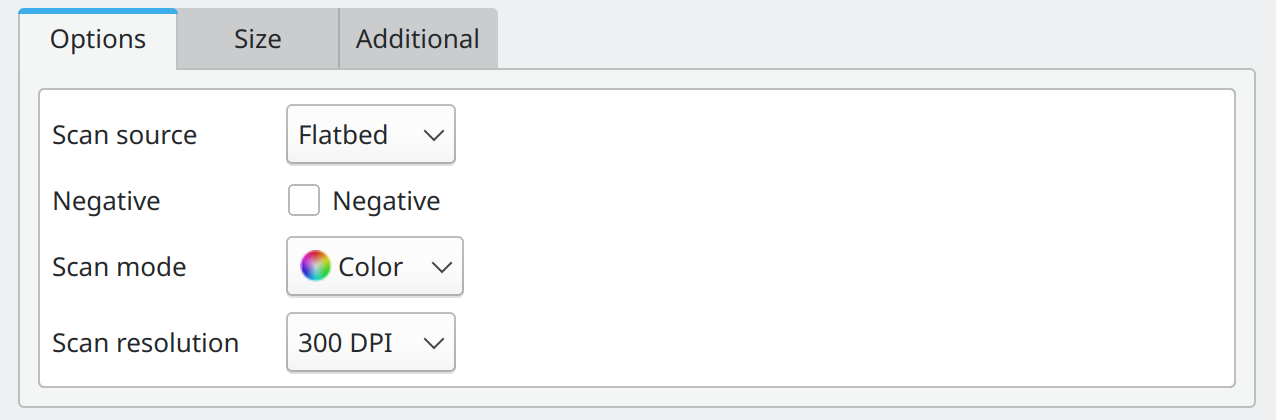
- Scan source. Note: during the scanning process, Master PDF Editor uses the driver of the scanner installed in the system, so the number of scan settings may vary. Below are some types of options that you can find.
- Flatbed. Place the document manually on the scanner glass. Suitable for single pages.
- ADF (Automatic Document Feeder). Automatic feeding of a stack of pages. Only the front side of each page is scanned.
- ADF (Automatic Document Feeder) Duplex. Automatic feeding with simultaneous scanning of both sides of the page in a single pass.
- ADF (Automatic Document Feeder) Front/Back. Automatic feeding with sequential scanning. First all front sides of the stack are scanned, then the scanner prompts you to reload the pages for scanning the back sides.
- Negative. Allows changing a colored PDF to black-and-white.
- Scan mode. Choose a scanning mode that best matches the type of document that is scanned. The available modes are Color Document and Grayscale Document.
- Scan resolution. Master PDF Editor supports scan resolutions ranging between 75 DPI and 600 DPI. Typically, 300 DPI is the optimal resolution for scanning documents in order to balance readability and file size. It is set by default.
Size
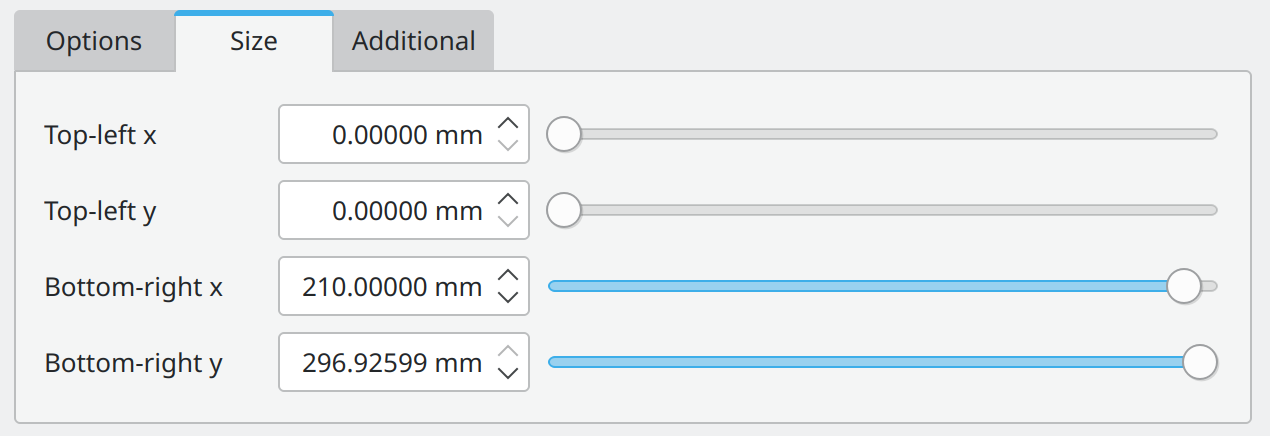
These values in this tab are compliant with the Page Size option. You can change the values manually if needed.
Additional
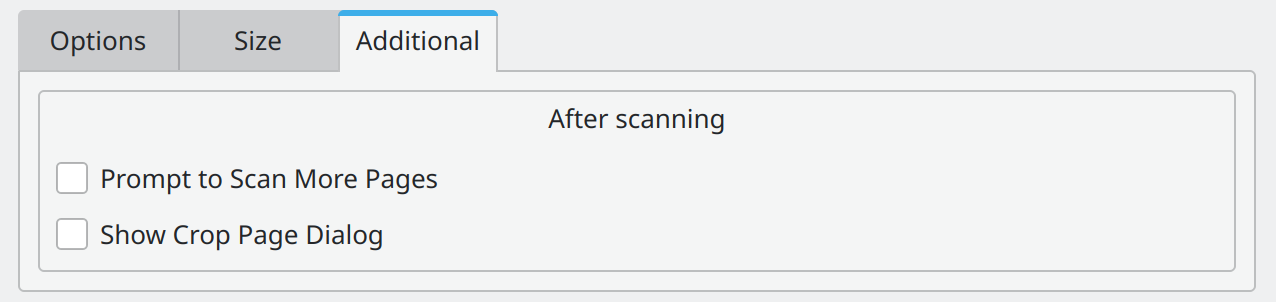
- Prompt to Scan More Pages. Allows scanning multiple pages into one PDF document.
- Show Crop Page Dialogue. Crop pages visually and then refine the cropped area.
Output
- Create New Document. After scanning pages, a new document with the scanned content is created.
- Append to Current Document. Choose this option to append scanned pages to the opened document.
Miscellaneous
- Deskew. Allows straightening a scanned document if it is scanned at an angle.
![]() The Deskew option is applicable only to pages with images containing text.
The Deskew option is applicable only to pages with images containing text.
- Remove background. Removes an unwanted background from the scanned document.
- Skip empty pages. Allows skipping pages without content while scanning a document.
- Preview. Select this option to preview the scanned pages before adding them to a new document.
- Scan. After the setting all the parameters, click Scan to scan your document.
Scanning documents on Windows
To create a new document from scanner:
1. Select File > New > From Scanner in the main menu, or press the Create a new document from scanner button ![]() on the toolbar. A dialog box for scanning documents will appear.
on the toolbar. A dialog box for scanning documents will appear.

2. In the Scan dialog, you can configure the following settings for scanning:
Input
- Scanner. Choose one of the connected scanners installed in the system from the list.
Output
- Create New Document. After scanning pages, a new document with the scanned content is created and saved to the specified path.
- Append to Current Document. Select this option to append scanned pages to the opened document.
Miscellaneous
- Deskew. Allows straightening a scanned document if it is scanned at an angle.
![]() The Deskew option is applicable only to pages with images containing text.
The Deskew option is applicable only to pages with images containing text.
- Remove background. Removes an unwanted background from the scanned document.
- Skip empty pages. Allows skipping pages without content while scanning a document.
- Prompt to Scan More Pages. Allows scanning multiple pages into one PDF document.
3. Click Scan to open the system scan dialog and adjust settings related to your scanner.
![]() During the scanning process, Master PDF Editor uses the driver of the scanner installed in the system, so the number of scan settings may vary.
During the scanning process, Master PDF Editor uses the driver of the scanner installed in the system, so the number of scan settings may vary.
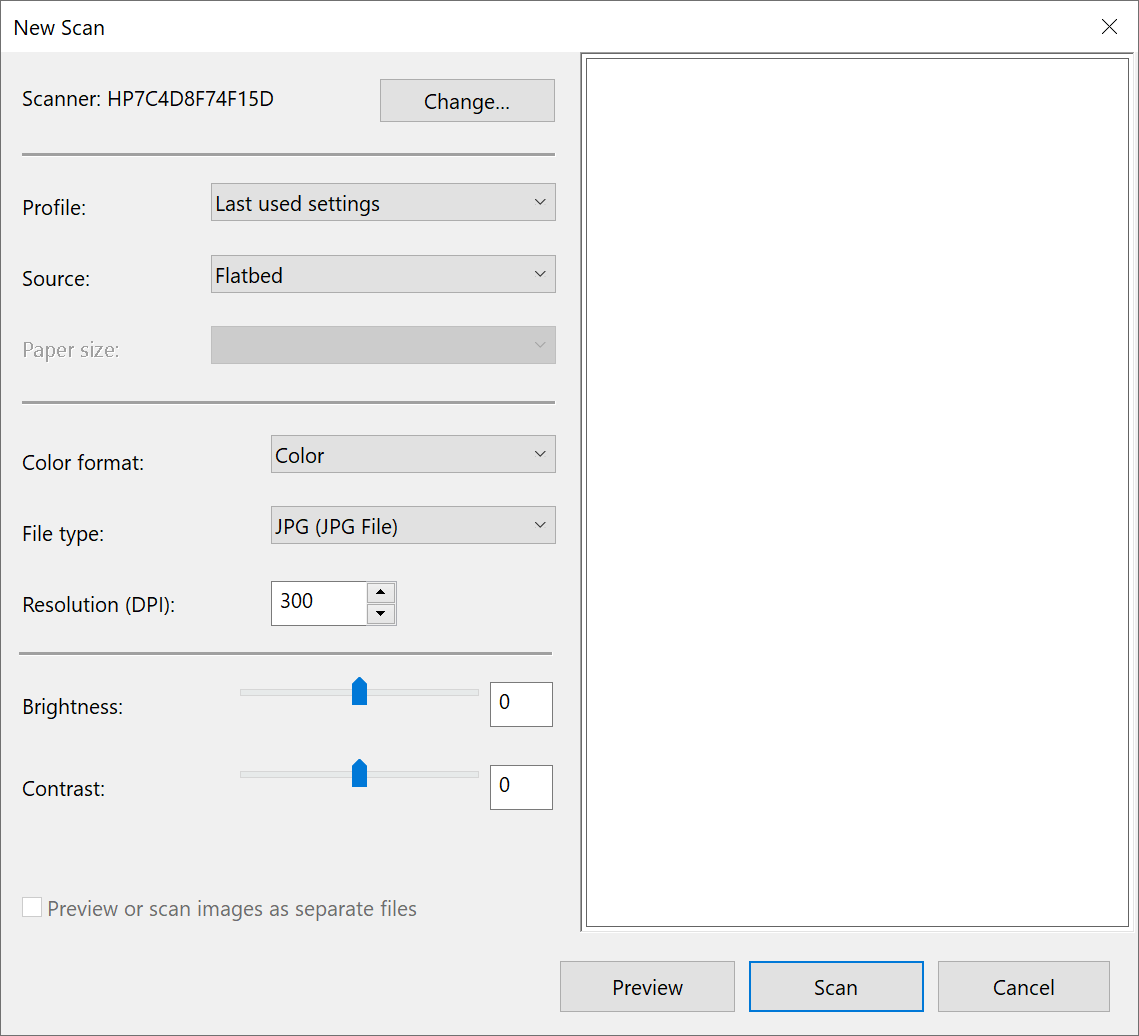
Below are the options that you can find in the system scan dialog:
- Scanner. If needed, change the selected scanner to the other scanner installed in the system.
- Profile. Select the profile that applies to your scan, or save scan settings to use them for the next scan.
- Source. Select the scanner type.
- Paper size. Select the size of the scanned document from the list of possible paper sizes.
- Color format. Select a color format that best matches the scanned document.
- File type. Select a file format for the scanned document.
- Resolution (DPI). Specify the scanning resolution in DPI. Typically, 300 DPI is the optimal resolution for scanning documents in order to balance readability and file size.
- Brightness. Set the brightness level for the scanned document.
- Contrast. Set the contrast level for the scanned document.
- Preview or scan images as separate files. Enable this option to preview or scan pages as separate files.
4. Click Preview to preview the scanned document.
5. Click Scan in the system scan dialog to have the document scanned.
More like this:
Insert blank pages
Insert pages from existing files
Split and Merge PDF Files
Read more about Master PDF Editor