Measurement Tools
Measurement tools allow you to measure distances, perimeters, and areas in the PDF document. You can use measurement tools to control and specify measurements in PDF blueprints, or make sure the actual size of the document elements fits the paper size before printing.
The following measurement tools are available:
- Line
 — measures the distance between two points.
 - Perimeter
 — measures the length of some perimeter.
 - Area
 — measures the area of some part of the document.
Using measurement tools
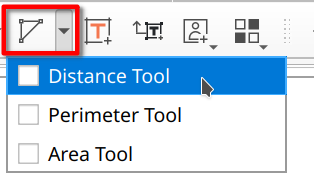
To use a measurement tool, click the corresponding button on the toolbar or use the Comments > Measurements menu. Clicking on the down arrow of the toolbar button allows you to select a measurement tool:
Using distance measurement tool
Click and hold the left mouse button to start drawing the Distance measurement tool. Move the mouse to the next point and release the button.
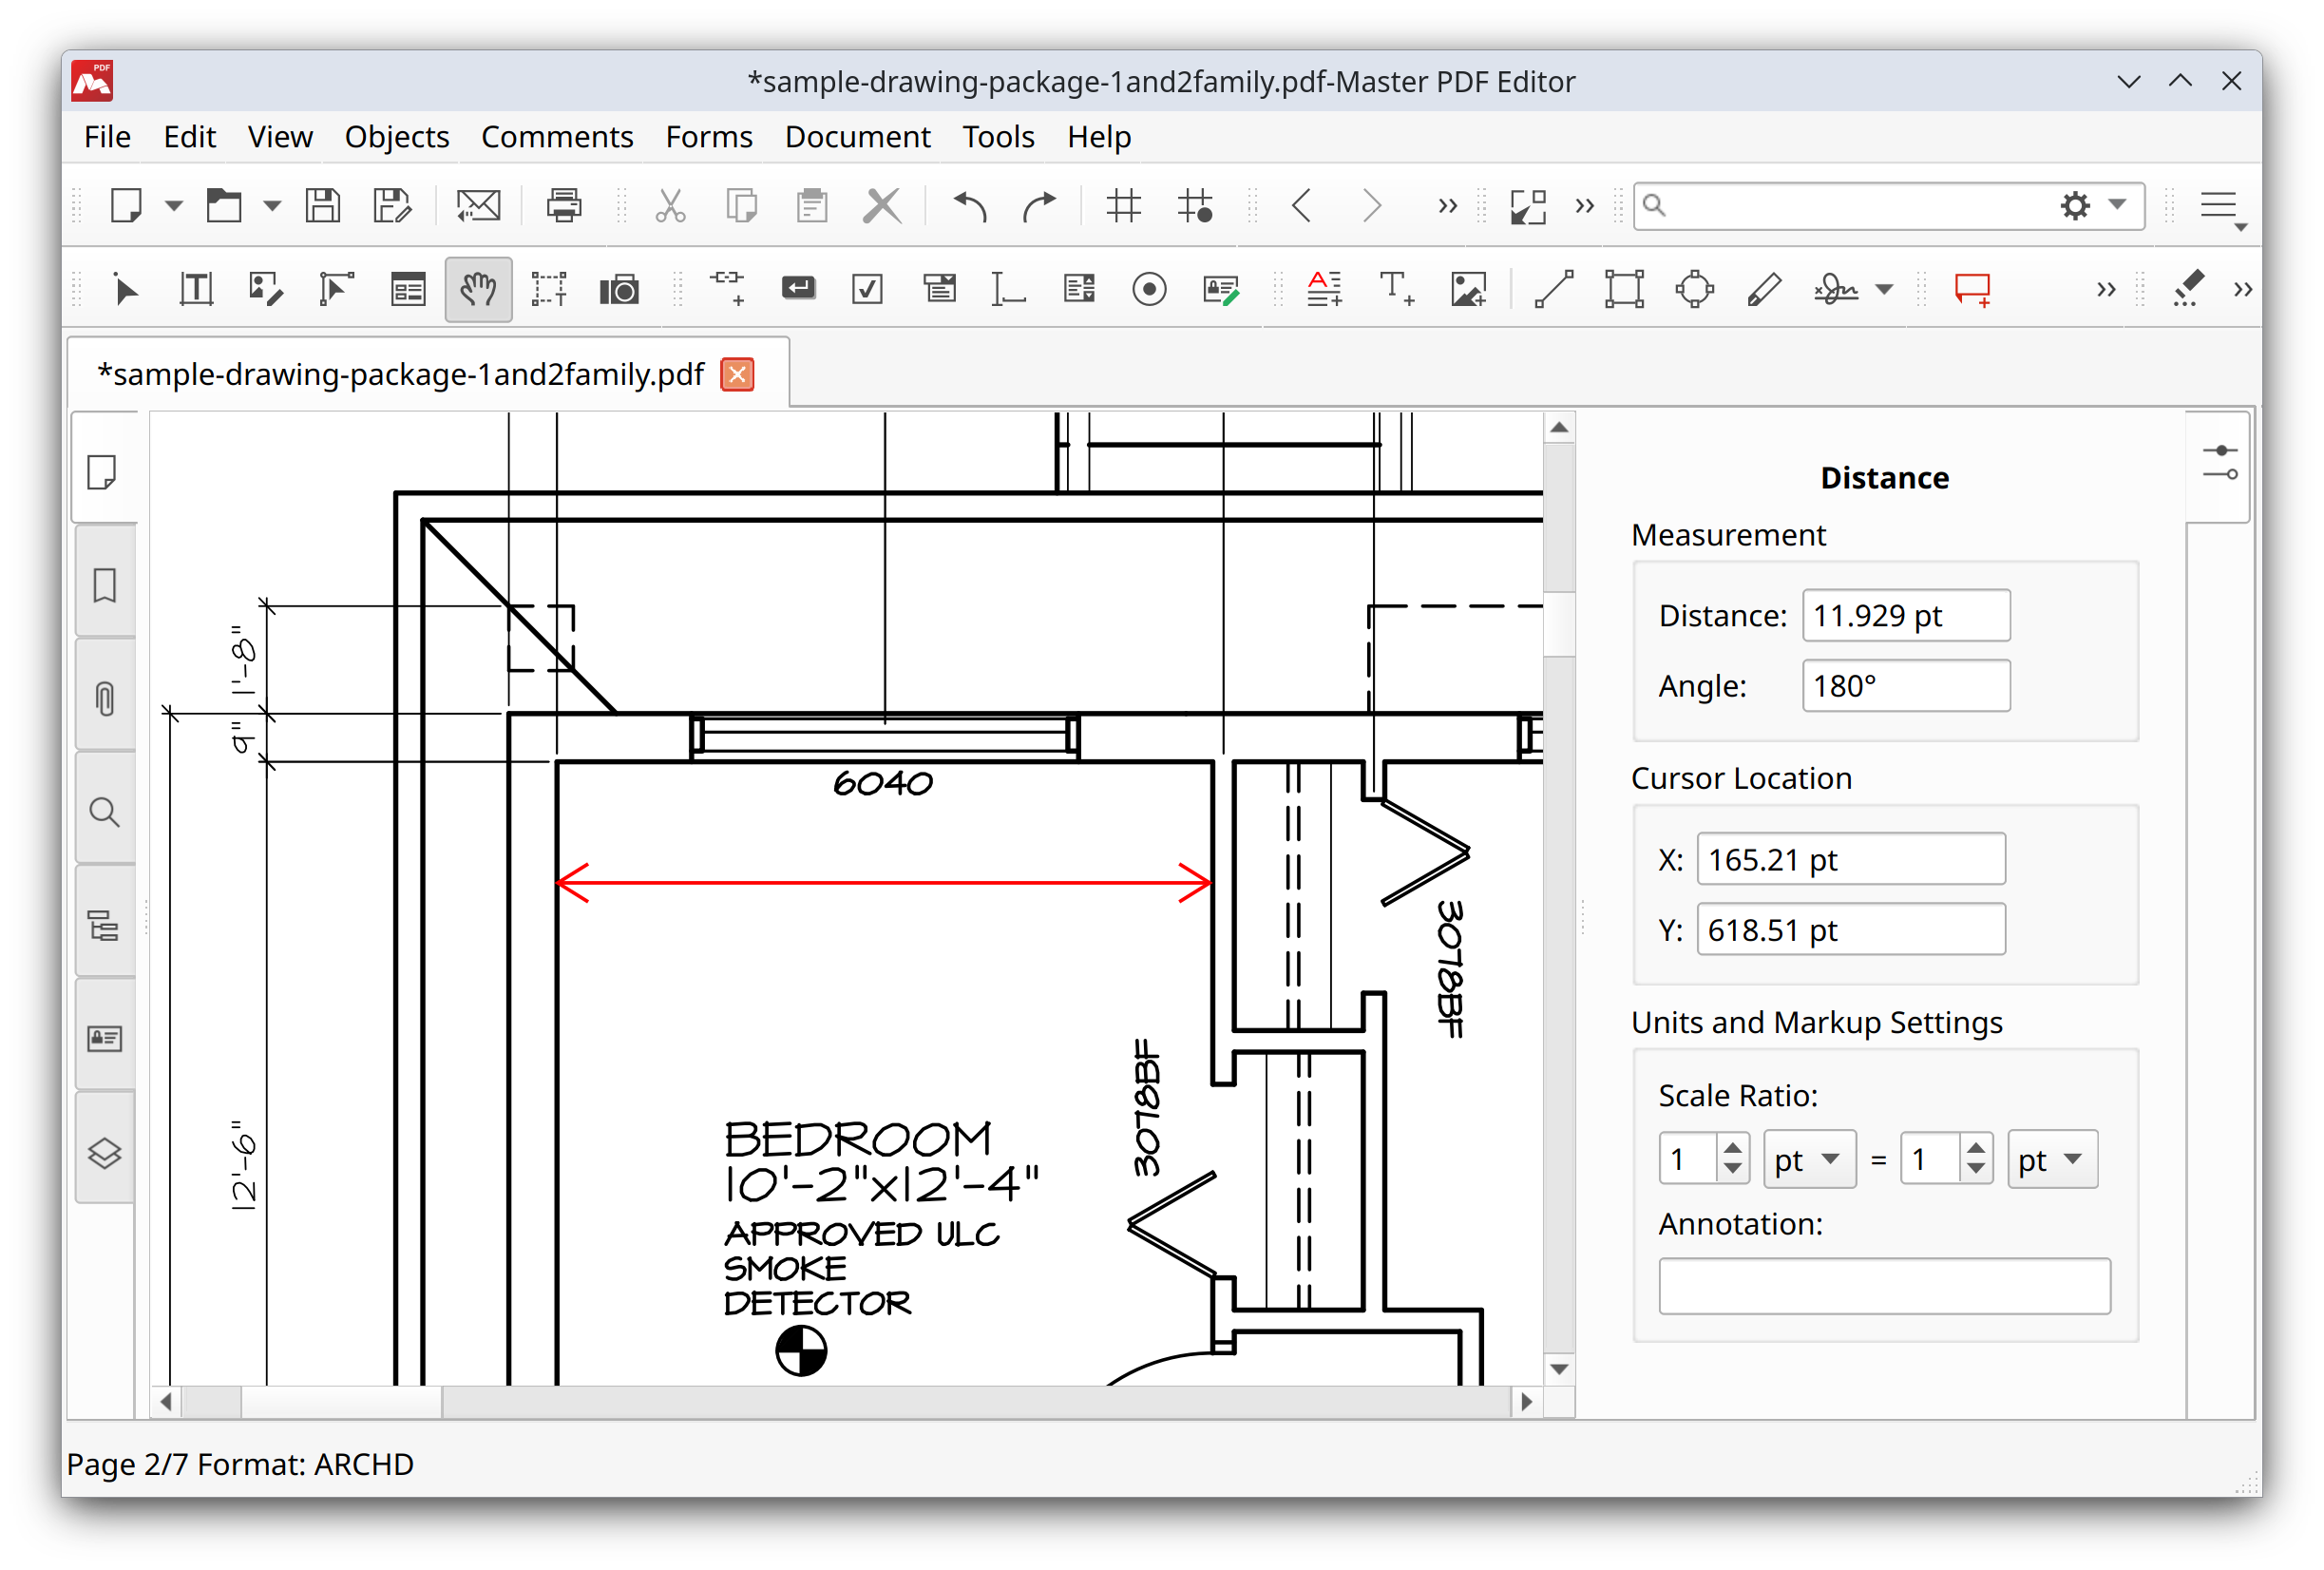
This is how the Distance Tool looks like in the file
When you move the mouse, the current coordinates and the distance are displayed in the Object Inspector window.
Press Esc or right-click to finish drawing.
To select the distance measurement line, select the Hand Tool ![]() and click the line. This will display its properties in the Object Inspector window.
and click the line. This will display its properties in the Object Inspector window.
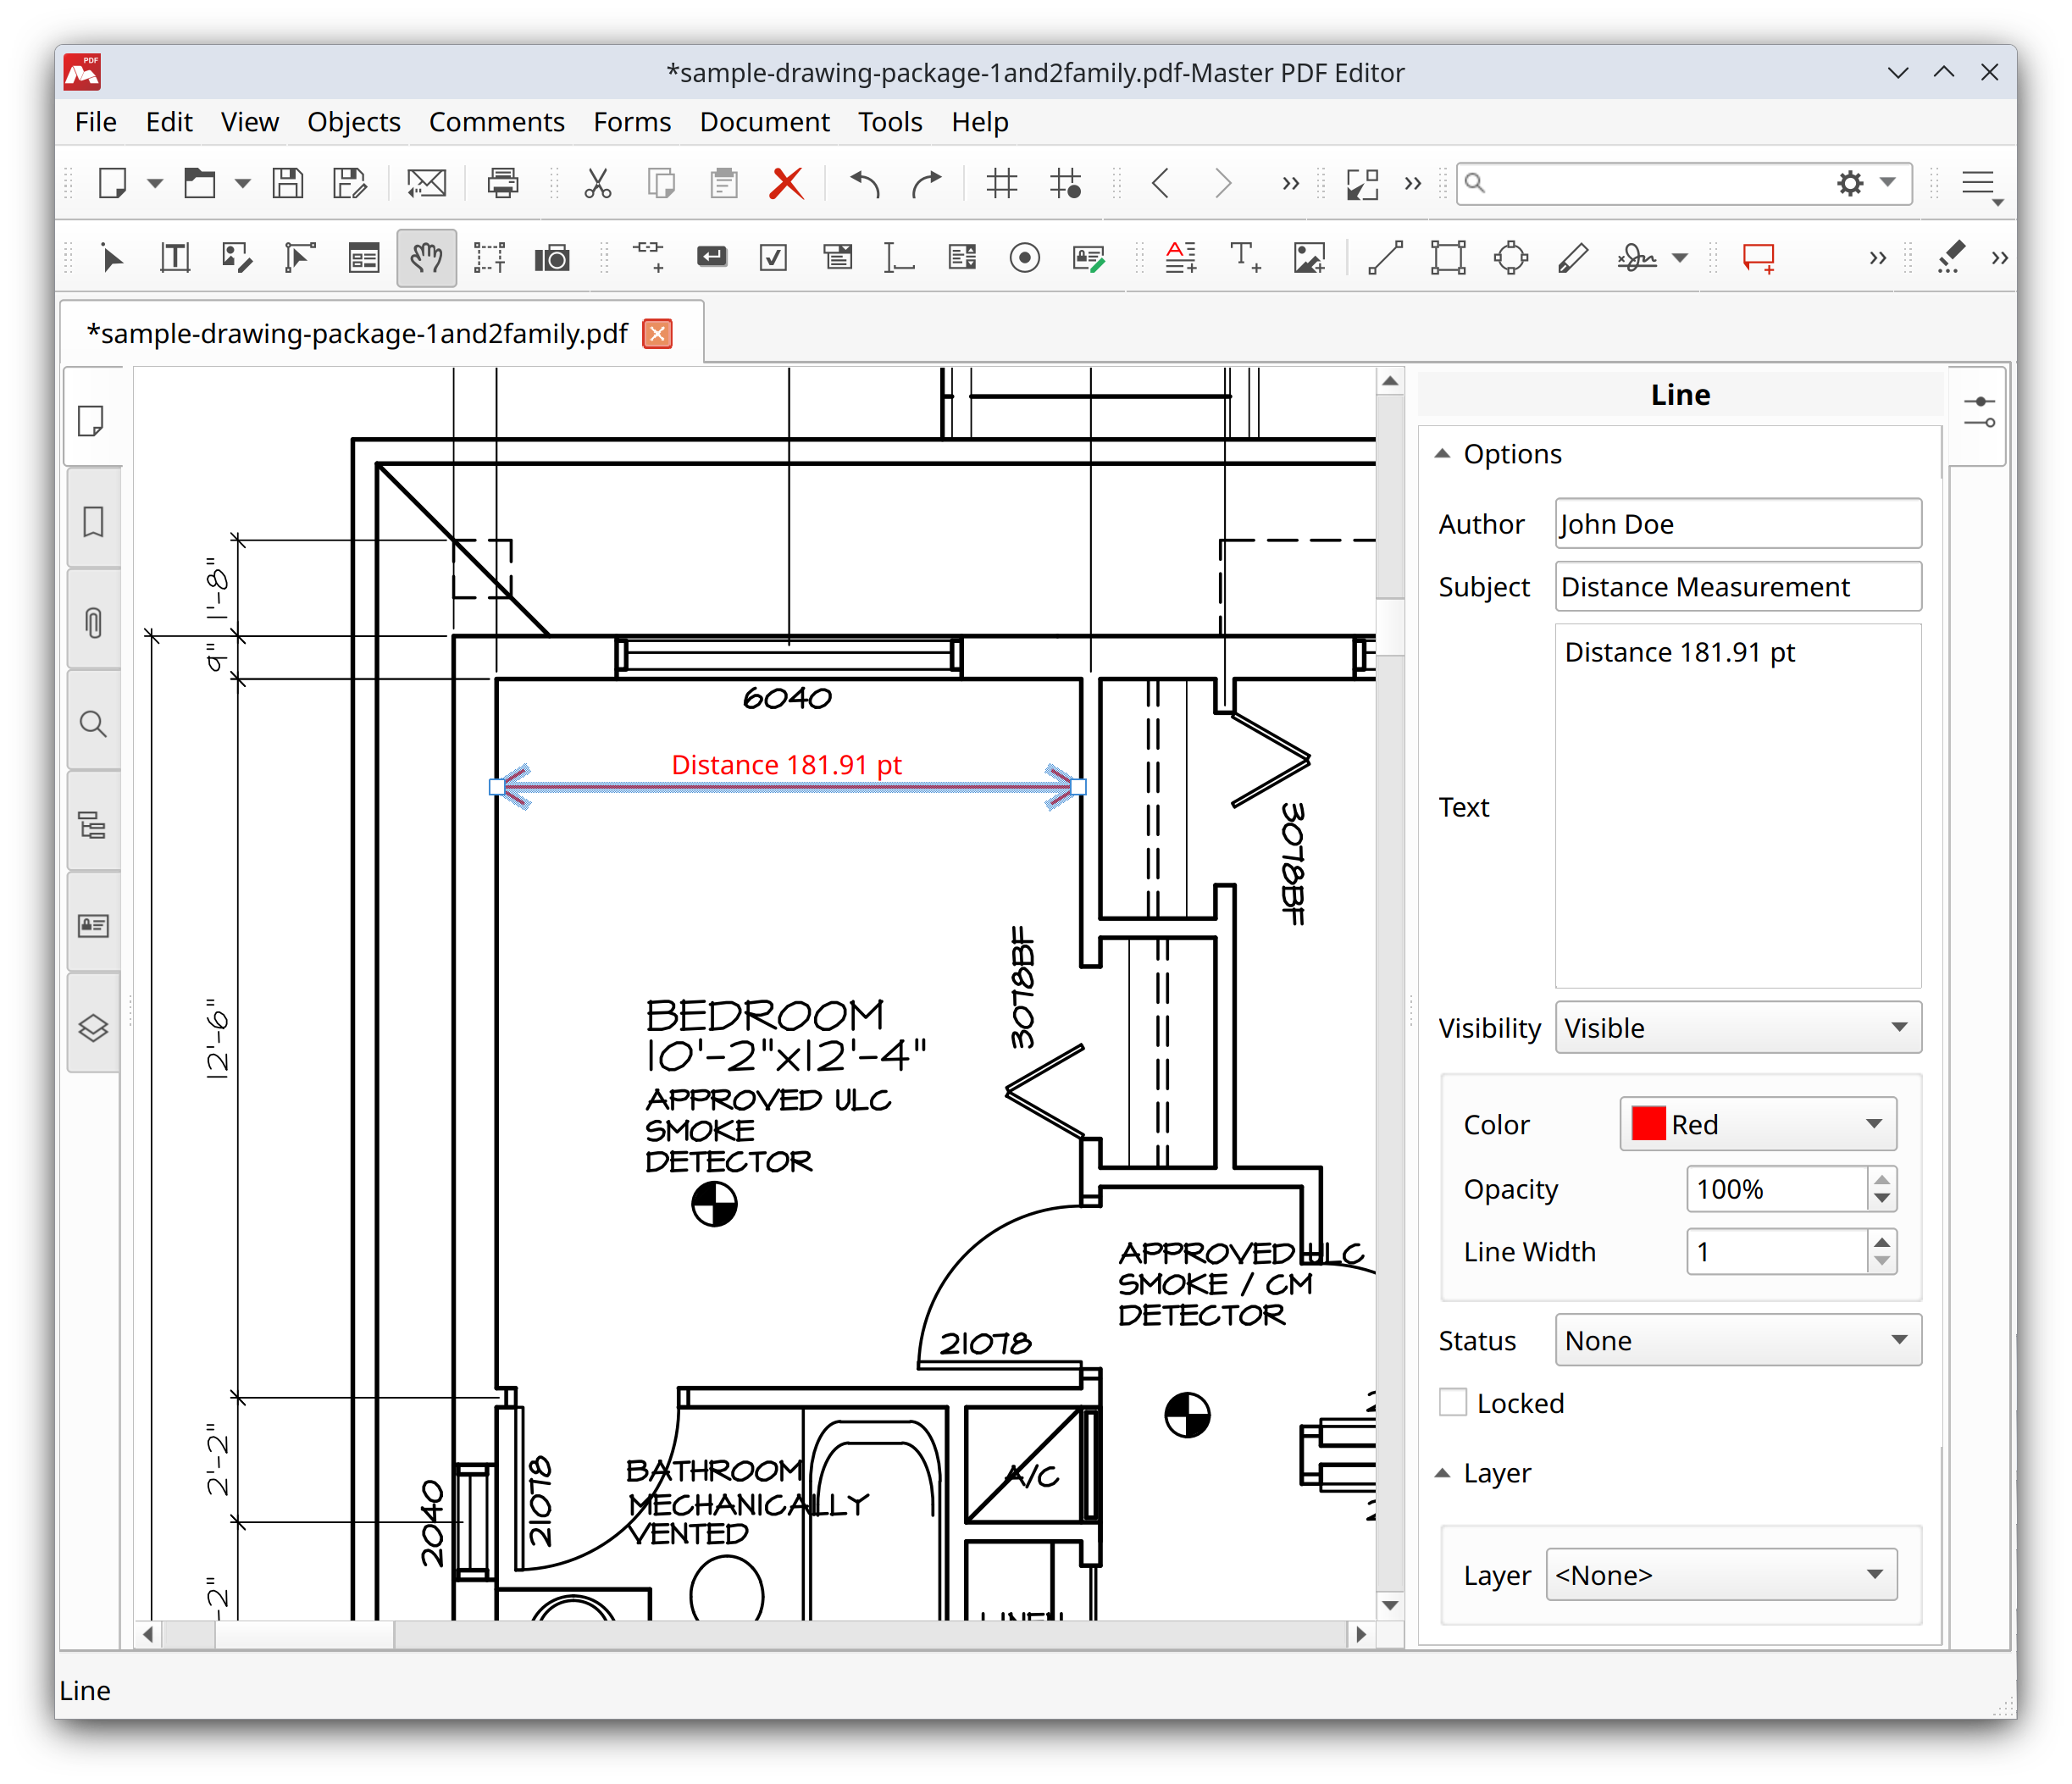
Editable properties of the Distance Tool include color, status, line width, opacity, visibility and others
The Visibility parameter allows setting the comment visibility on the screen and in printed form. You can select one of these options: Visible, Hidden, Visible but not printable, and Printable but not visible.
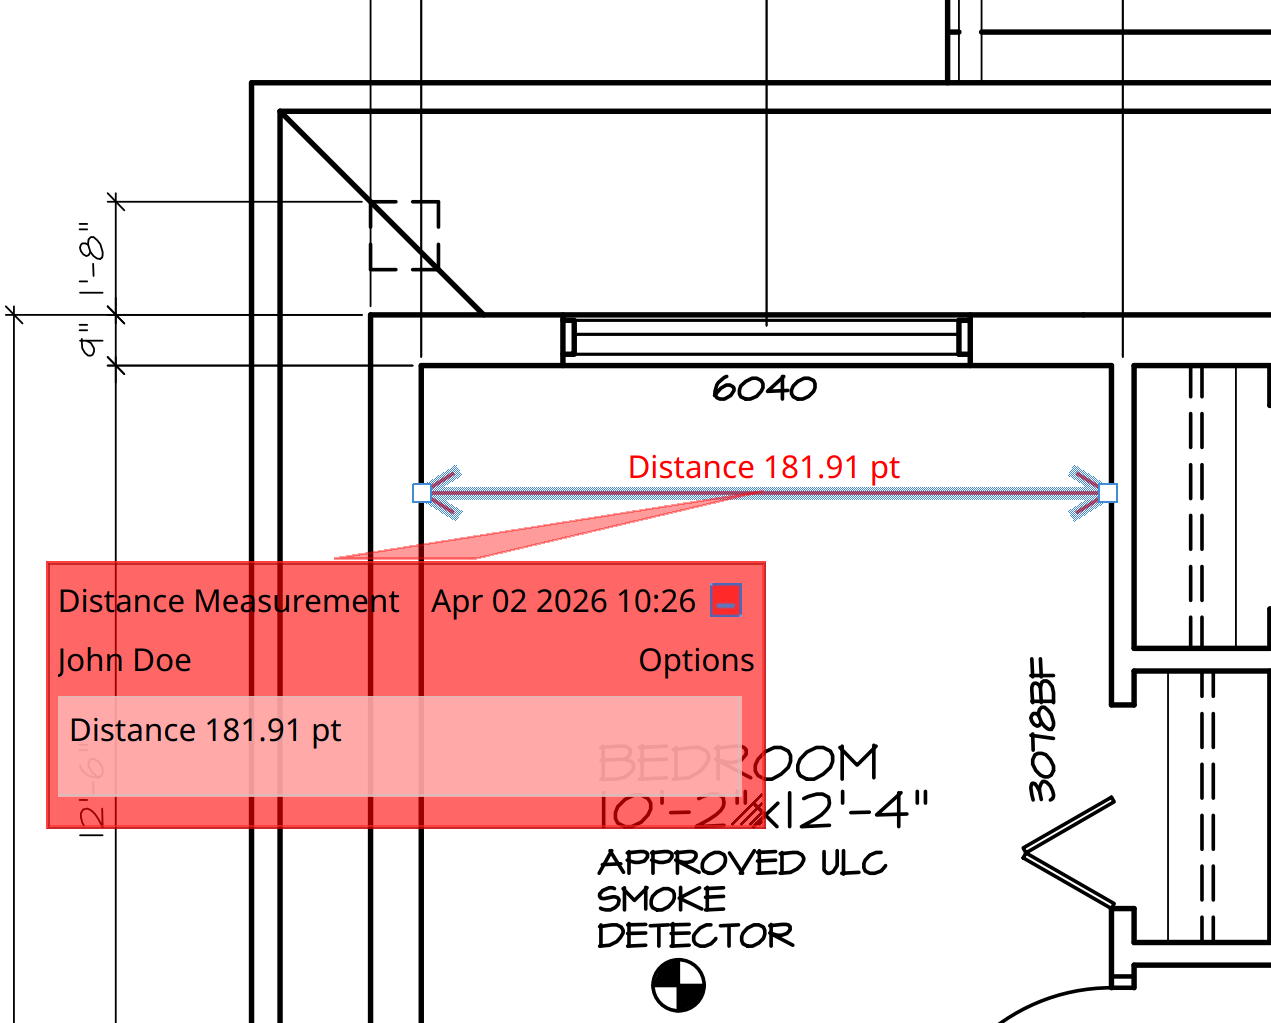
Double-click the line to display the balloon tooltip with the text comment:
Using perimeter measurement tool
The Perimeter Tool allows you to measure the cumulative length of several straight fragments. To start drawing with the Perimeter Tool, click with the left mouse button at the beginning of the first fragment, then click the second point, then go to the third one and so on until you go around the entire perimeter.
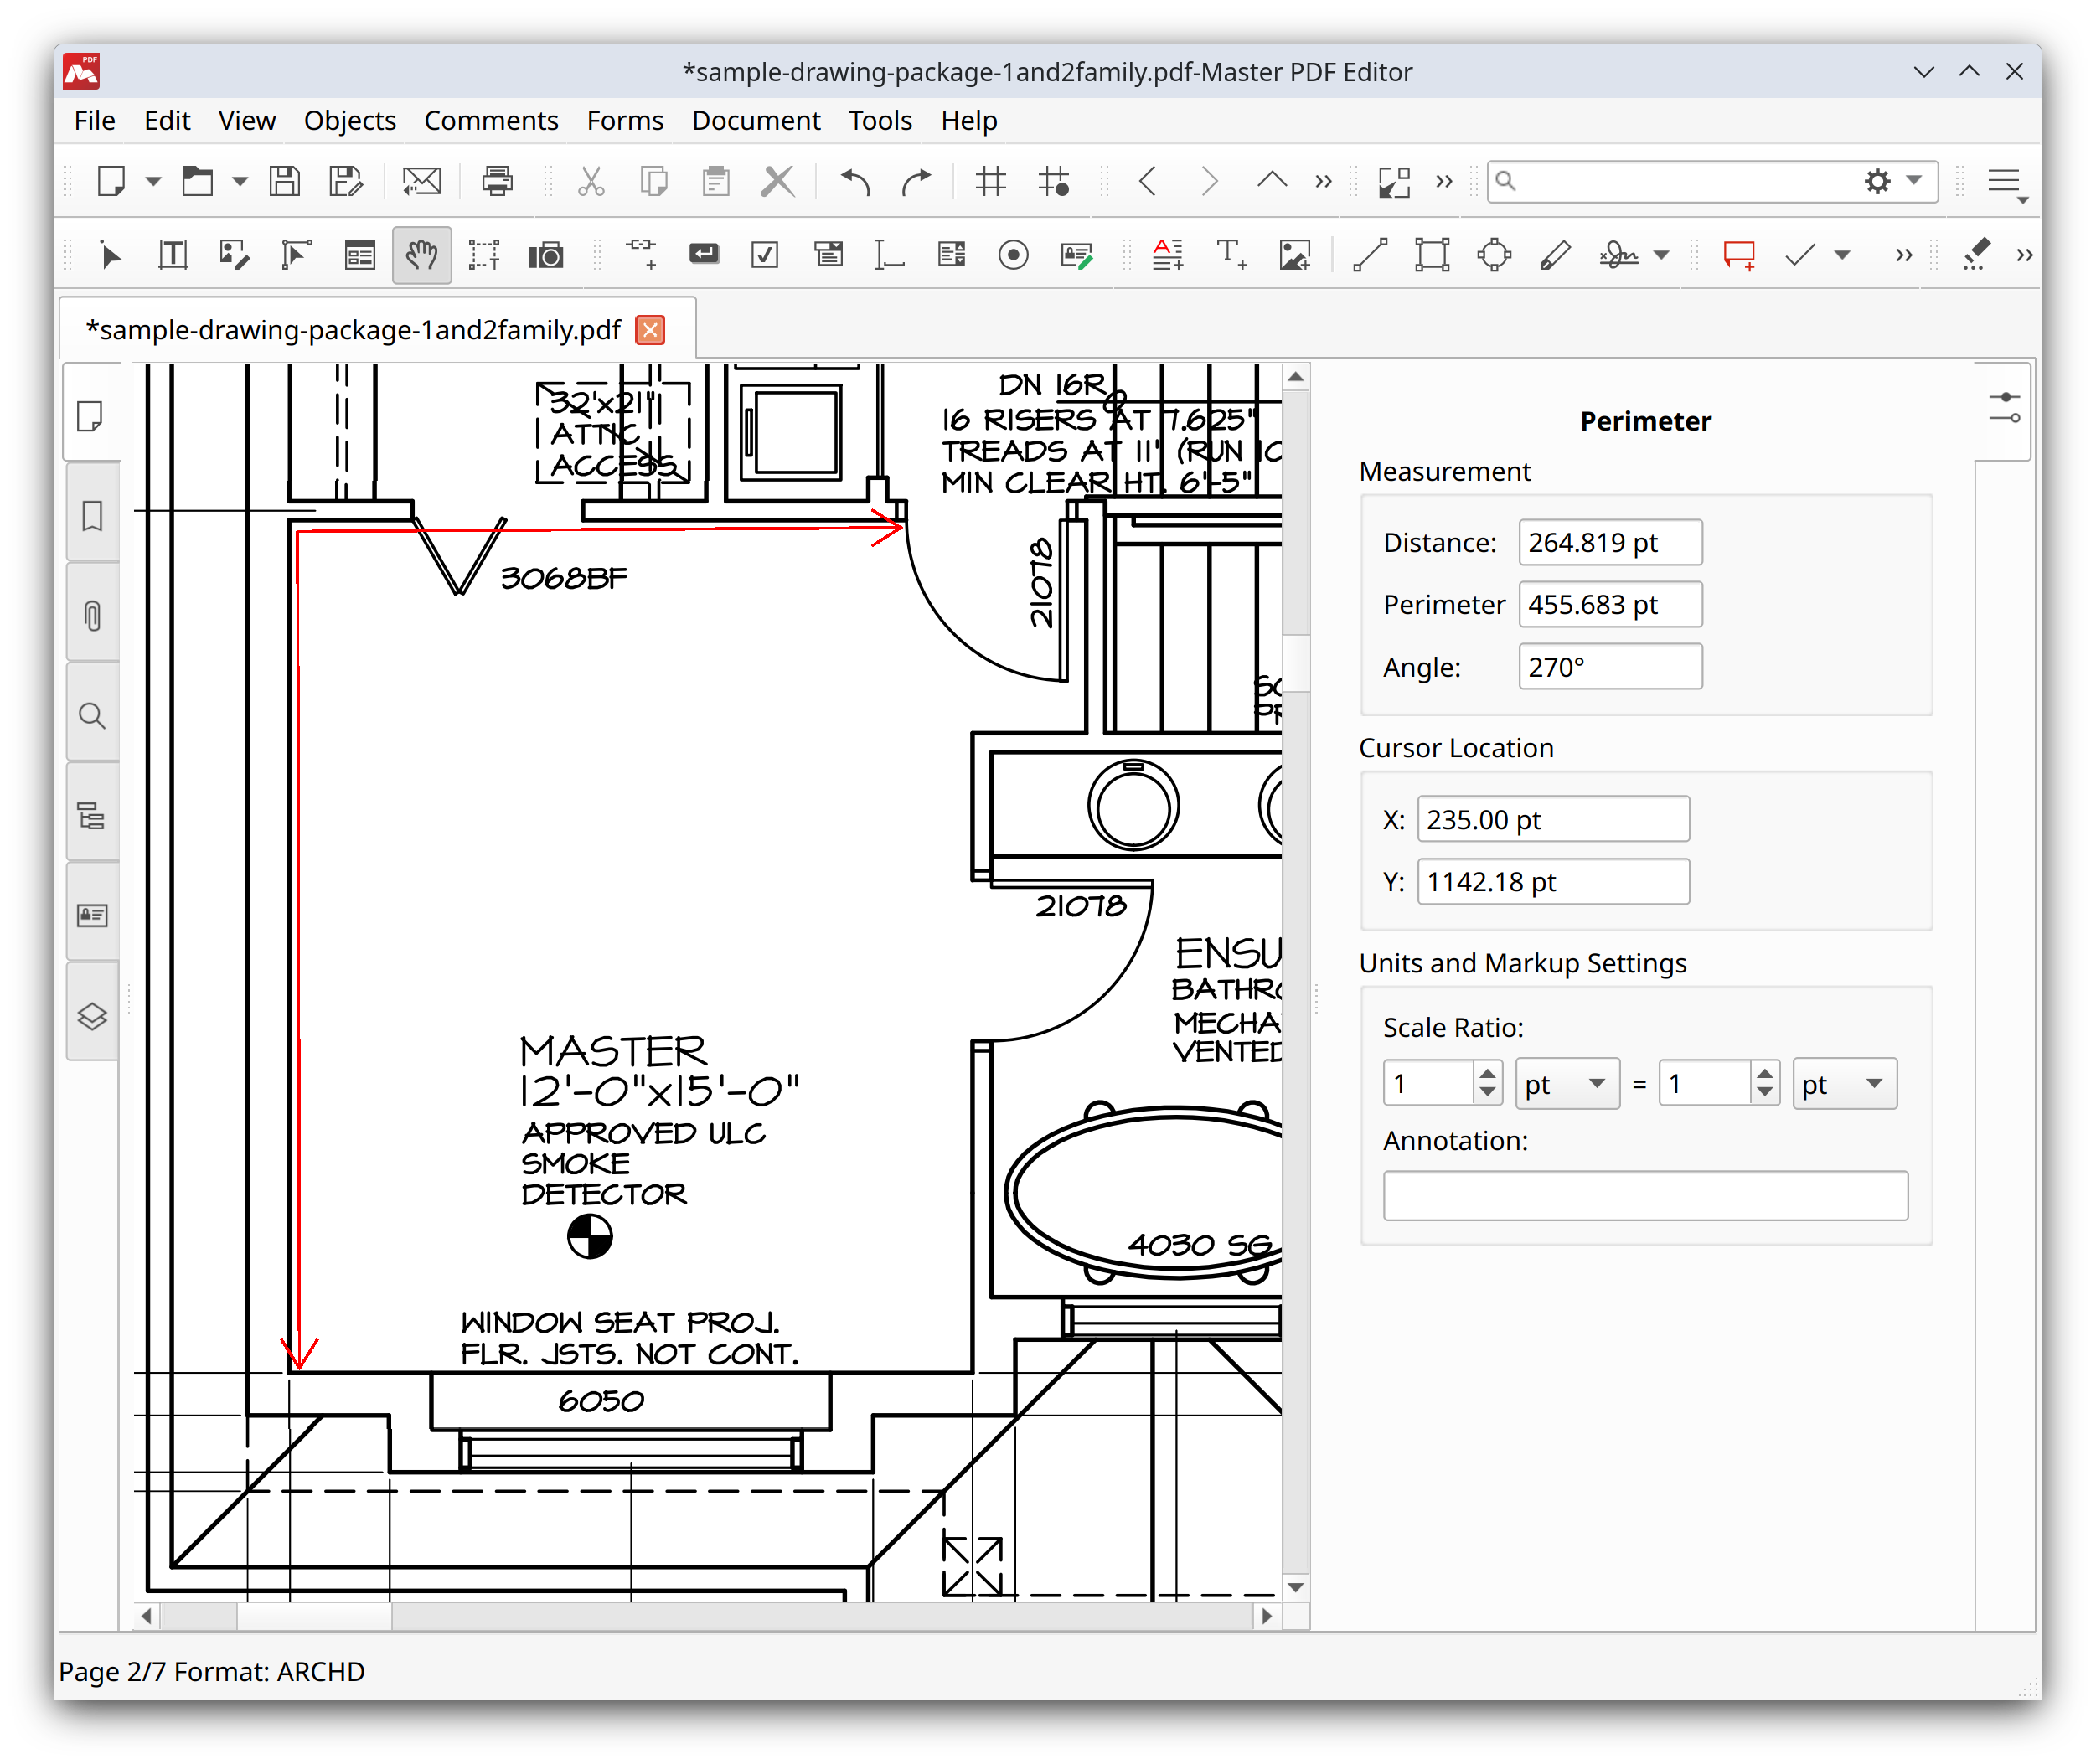
These parameters are displayed in the Object Inspector when using the Perimeter Tool
The distance of the latest fragment and the entire perimeter length so far are displayed in the Object Inspector panel.
Double-click or right-click when the final point of the perimeter is set. Press Esc or right-click to finish drawing.
To select the perimeter object, choose the Hand Tool ![]() and click the perimeter:
and click the perimeter:
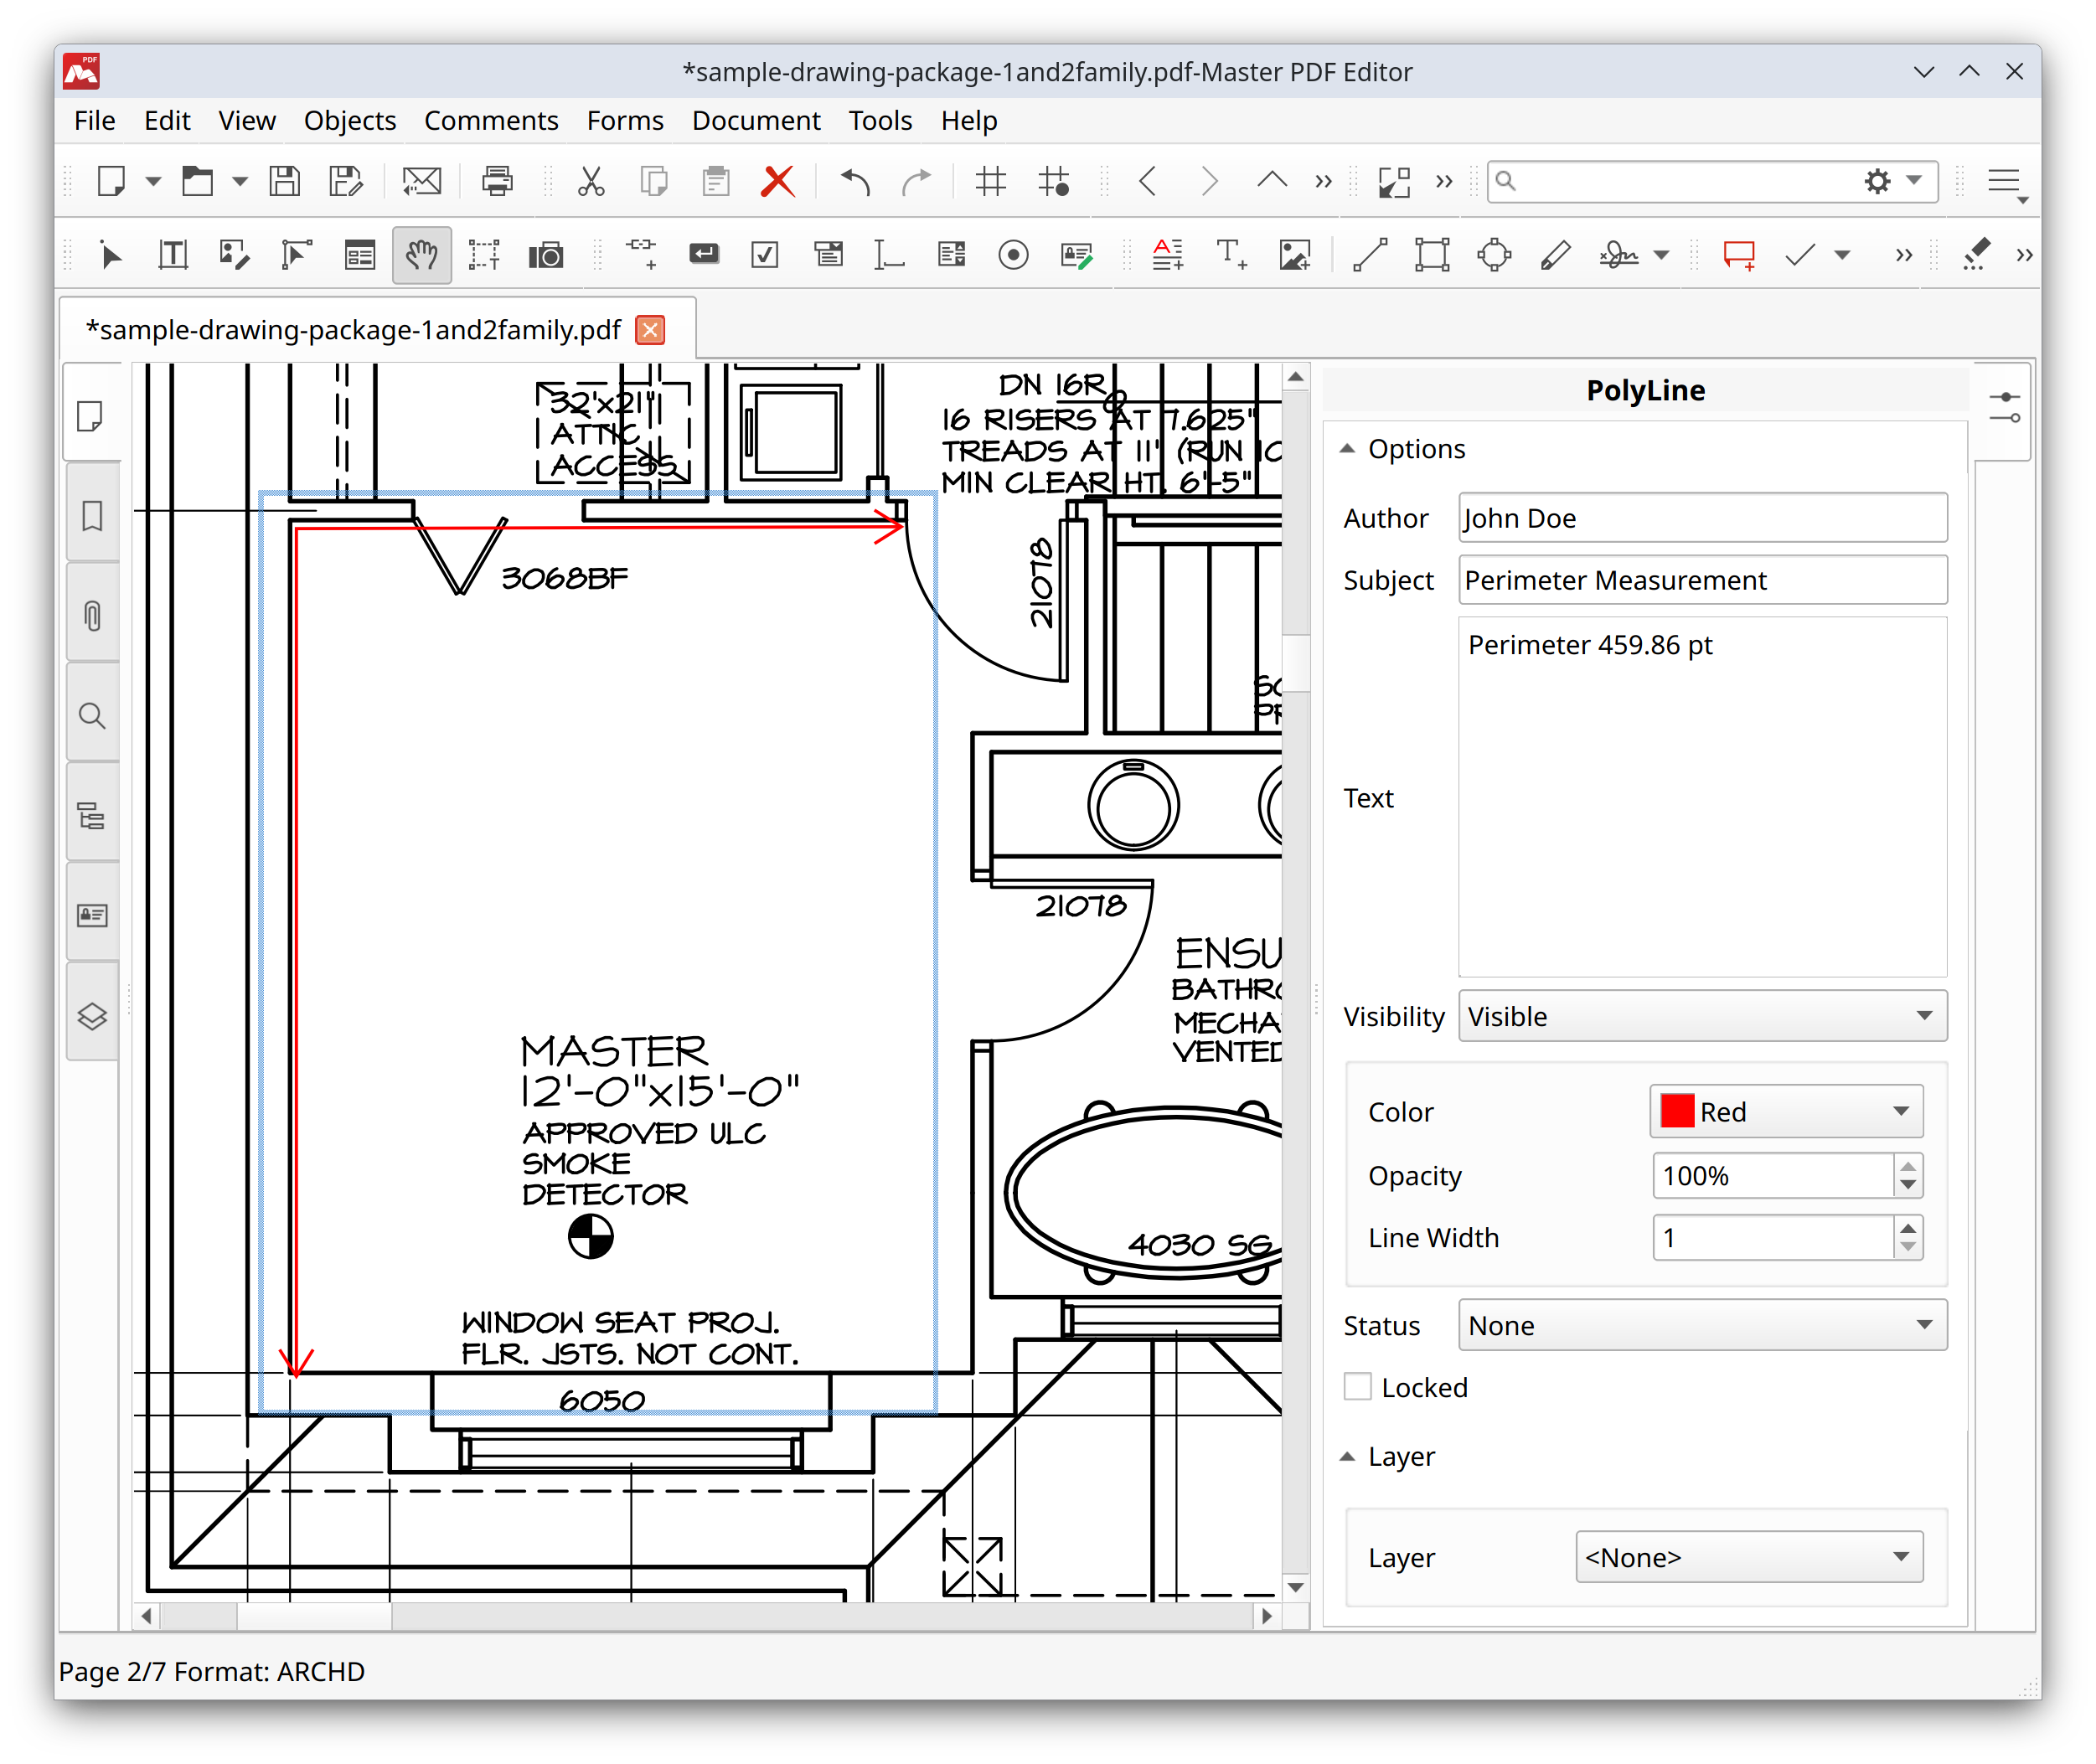
The editable perimeter parameters like visibility, status, or color are displayed in the Object Inspector
The parameters of the perimeter are displayed in the Object Inspector.
Double-click the perimeter to bring up the balloon tooltip.
Using the area measurement tool
To measure an area in the document, select the Area Tool. Click the first point, then the second and following points until you mark the entire area you want to measure.
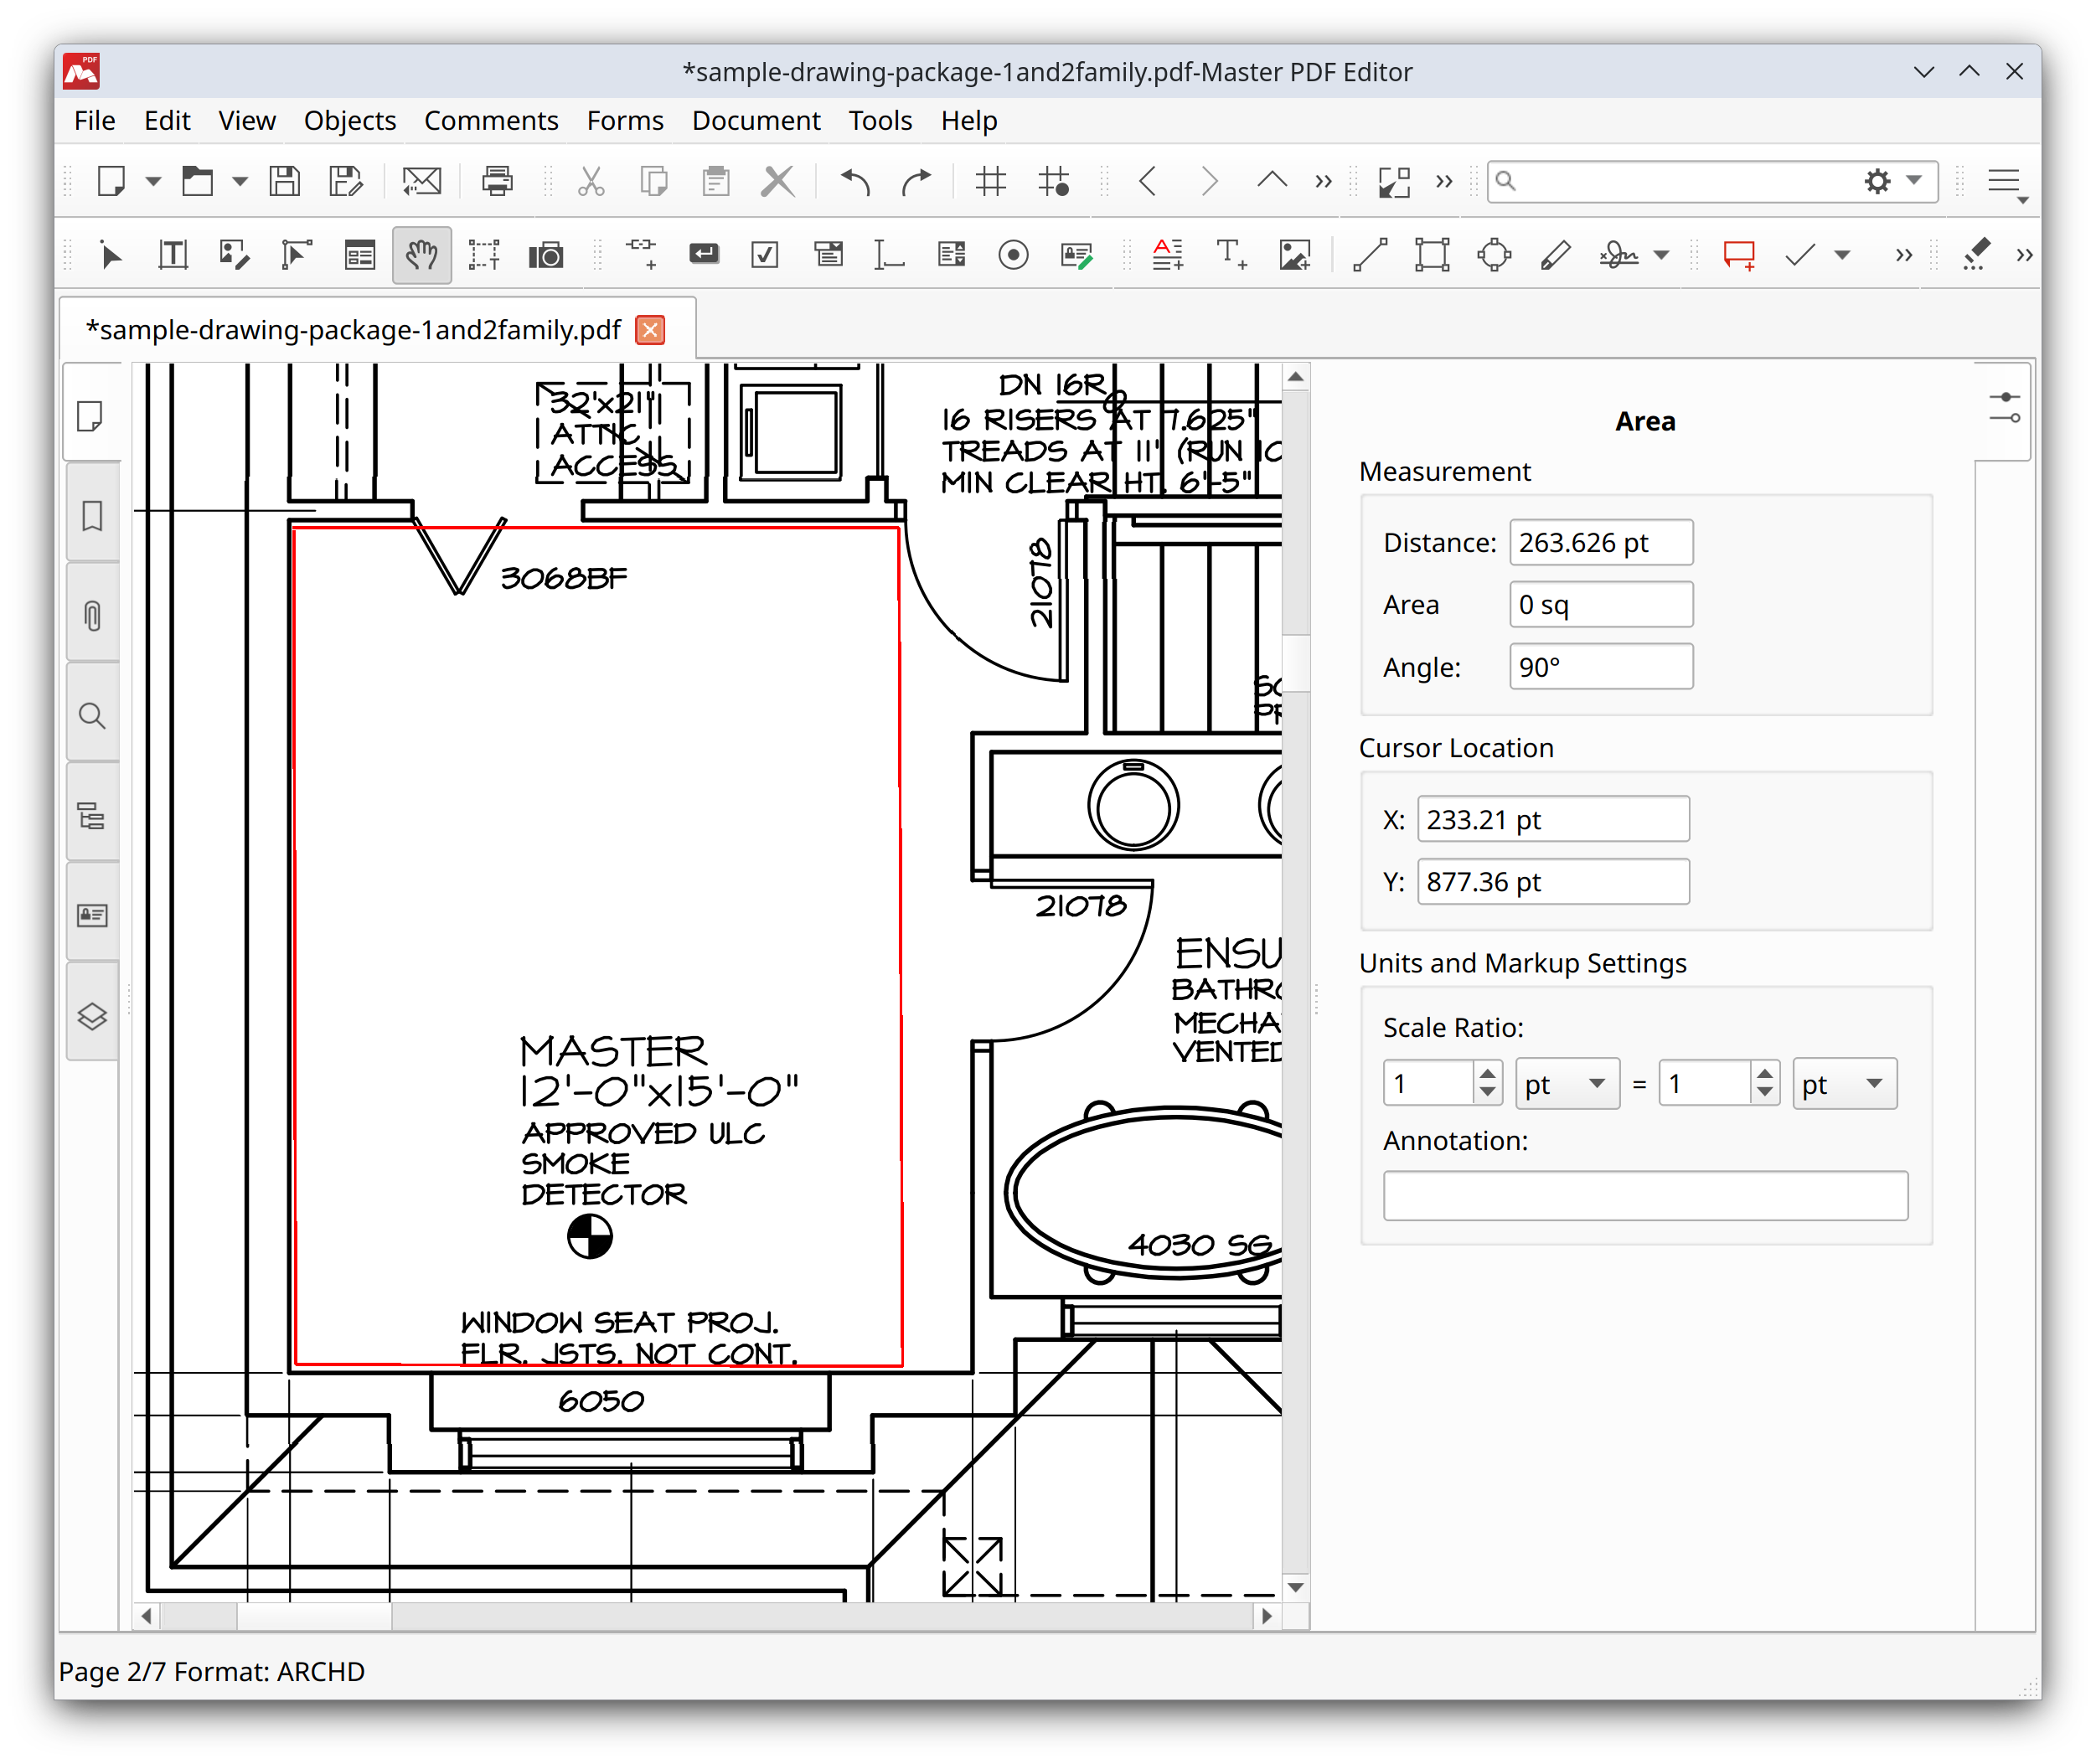
Properties of the Area Tool shown on the side panel
The Object Inspector panel displays coordinates, the length of the latest fragment and the angle of the current fragment. To finish measuring the area, right-click or double-click. The remaining fragment will be built automatically from the current point to the beginning point.

You can change numerous properties of the Area Tool on the side panel
The area of the specified polygon is calculated automatically based on the current scale (see below).
To select the area measurement drawing, switch to the Hand Tool ![]() mode and click the area. In the Object Inspector window, you will see properties of the selected object such as visibility, color, opacity, line width or status.
mode and click the area. In the Object Inspector window, you will see properties of the selected object such as visibility, color, opacity, line width or status.
Double-click the area measurement drawing in the document to display the balloon tooltip with text comments and all the replies.
Setting the scale ratio of measurement tools
Scale ratio allows you to display real length and area when you use measurement tools.
To set the scale ratio, select any of the measurement tools. The settings of the tool will be displayed in the Object Inspector.
The Scale Ratio parameter allows you to set the relation between lengths in the document and the real ones.
The left box sets the value and the unit in the document, the right box sets the real value.
For example, if the blueprint says the scale is 1:10, this means each one millimeter in the document corresponds to ten real millimeters.
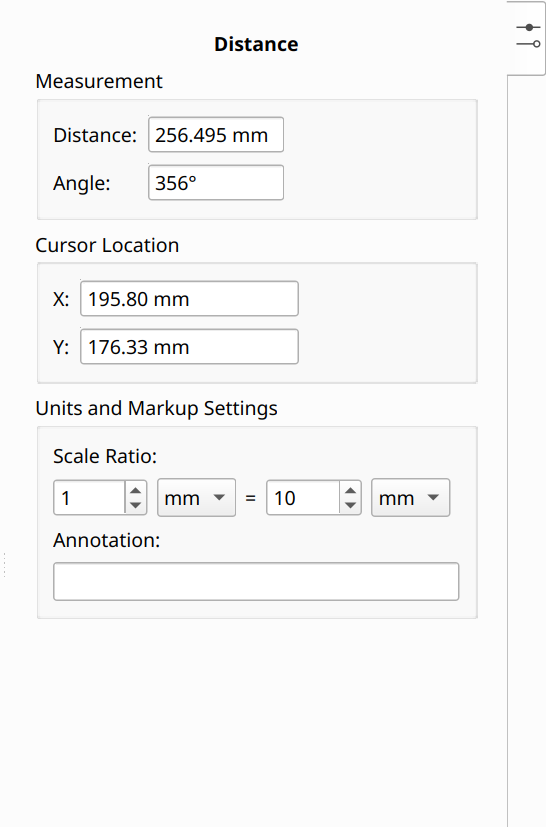
If the Scale Ratio is set, Master PDF Editor will display scaled values in the measurement tools.
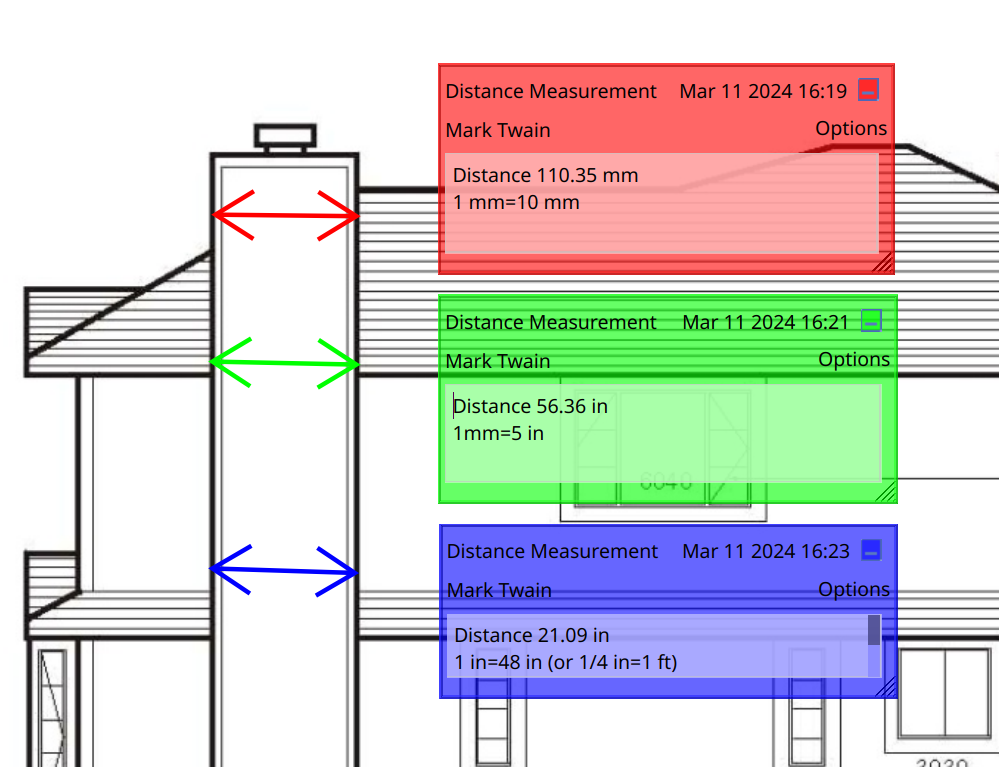
Here, we measure the same length on the drawing, but set different scale ratios. Hence, the resulting distance displays different values.